On this page
How to set up a secure remote MySQL connection
Connect to your MySQL database remotely and securely using SSH tunnelling with MySQL Workbench or HeidiSQL.
Direct remote MySQL connections are disabled on Kualo's shared servers to maintain PCI compliance and improve security. You can still access your databases remotely by using SSH tunnelling, which routes the connection securely through your SSH session.
SSH access must be enabled on your account before you can follow these steps. If you are not sure whether it is enabled, contact us and we can check for you.
Two free tools that support SSH tunnelling are MySQL Workbench and HeidiSQL. Both are covered below.
MySQL Workbench
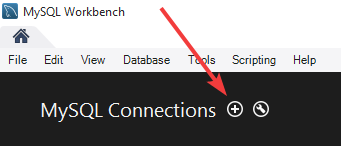
Step 1 - create a new connection
Open MySQL Workbench and click the + icon to add a new connection.
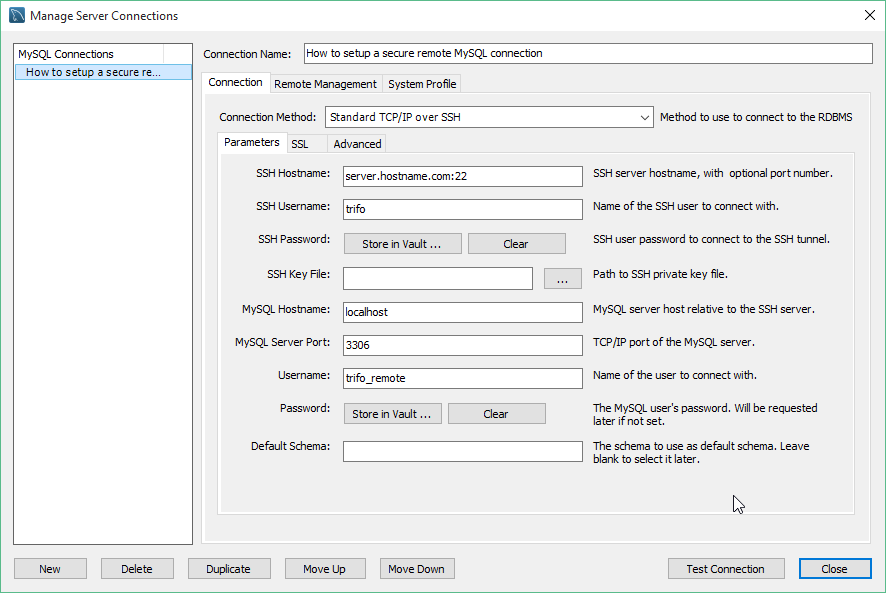
Step 2 - fill in the connection details
Complete the fields as follows:
| Field | Value |
|---|---|
| Connection method | Standard TCP/IP over SSH |
| SSH hostname | Your server hostname and SSH port, e.g. server.hostname.com:22 |
| SSH username | Your cPanel username |
| SSH password | Click Store in Vault... and enter your cPanel password |
| MySQL hostname | localhost |
| MySQL server port | 3306 |
| Username | Your database username |
| Password | Click Store in Vault... and enter your database password |
Step 3 - test and connect
Click Test Connection. If all the details are correct, you will see a success message.
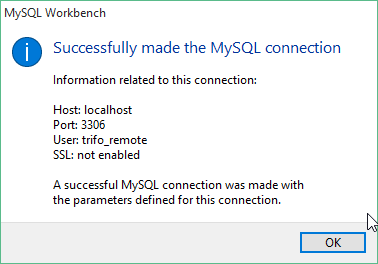
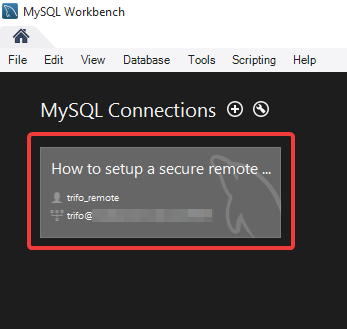
You can then open the database by clicking its shortcut and selecting Connect.
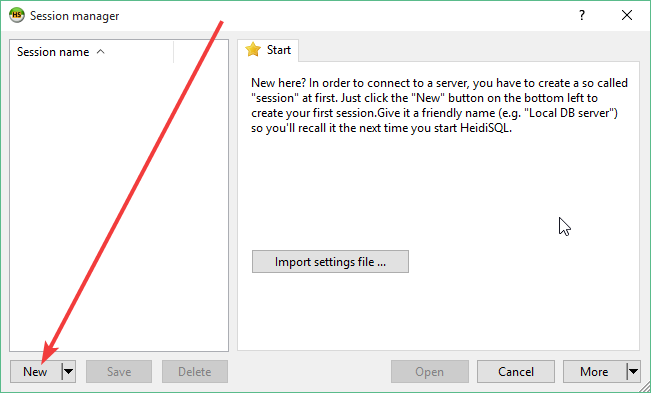
HeidiSQL
Step 1 - create a new session
Open HeidiSQL and click New in the bottom-left corner to create a new connection session.
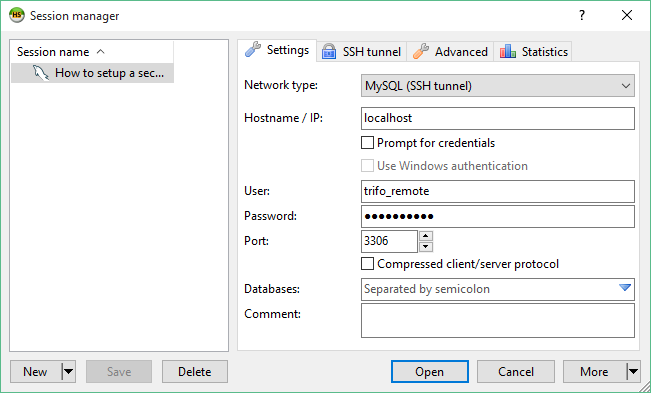
Step 2 - fill in the Settings tab
On the Settings tab, complete the fields as follows:
| Field | Value |
|---|---|
| Network type | MySQL (SSH tunnel) |
| Hostname / IP | localhost |
| User | Your database username |
| Password | Your database password |
| Port | 3306 |
Step 3 - fill in the SSH tunnel tab
Switch to the SSH tunnel tab and complete the fields as follows:
| Field | Value |
|---|---|
| plink.exe location | Download plink.exe and browse to its location |
| SSH host + port | Your server hostname and SSH port |
| Username | Your cPanel username |
| Password | Your cPanel password |
| Local port | 3307 or another unused port on your computer |
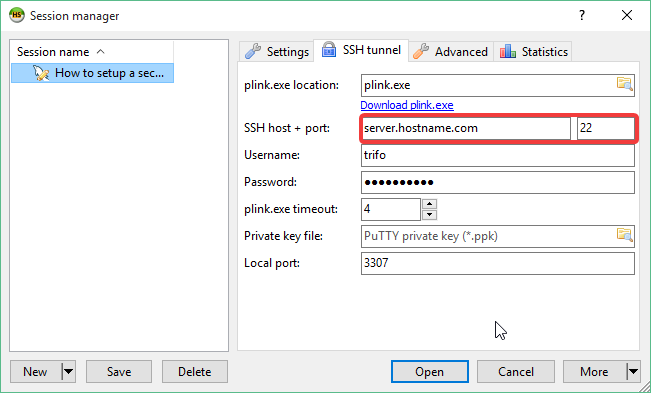
plink.exe is part of the PuTTY suite of tools and can be downloaded from the PuTTY website.
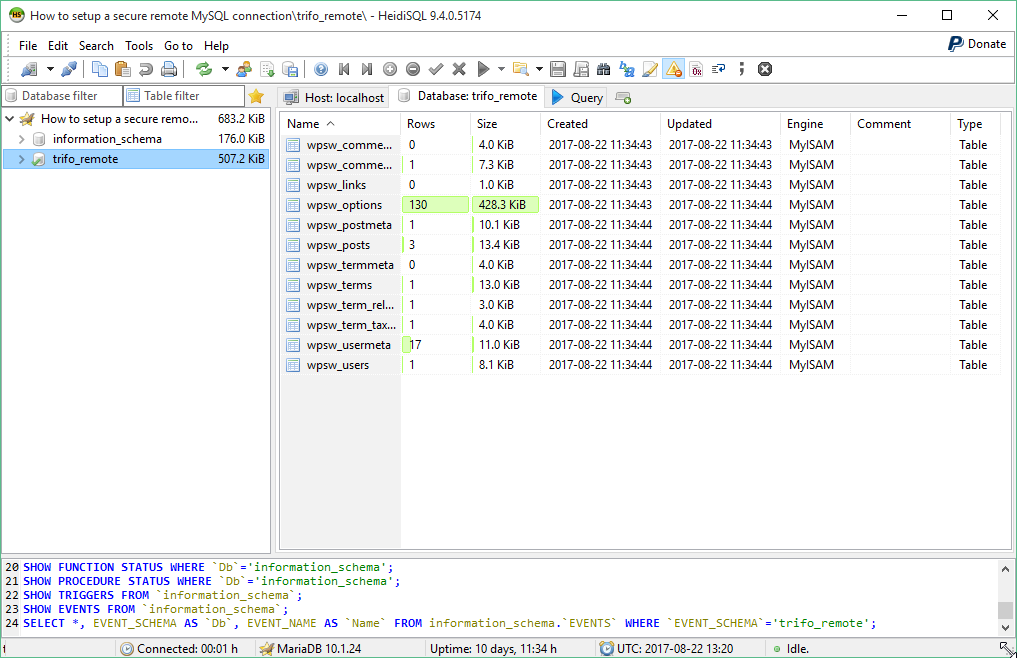
Step 4 - save and connect
Click Save, then Open to connect.
HeidiSQL may prompt you to cache the server's host key in the registry. Click Yes to continue.
If all the details are correct, you will be connected to your database.
If you need any further help, please contact us.