On this page
How to create a MySQL database in cPanel
Use the Database Wizard in cPanel to create a MySQL database, add a user, and grant privileges in a few quick steps.
Most web applications - WordPress, Magento, online shops and forums among them - store their content in a MySQL database. On your Kualo hosting the quickest way to set one up is the Database Wizard in cPanel, which walks you through the whole job in four short steps: creating the database, adding a user, and giving that user access.
By the end you will have the three details your application needs to connect: a database name, a username, and a password.
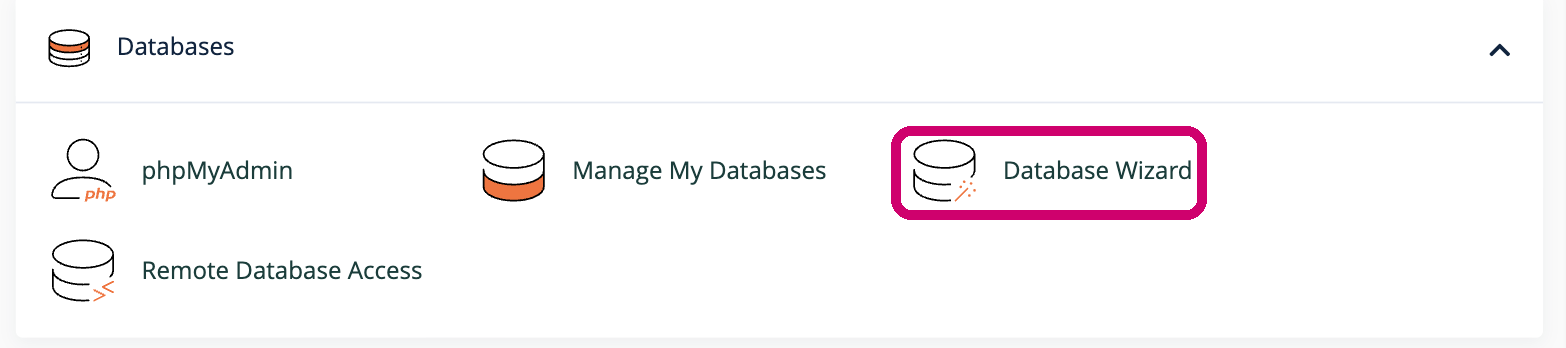
Step 1 - open the Database Wizard
Log in to cPanel and find the Databases section, then click Database Wizard.
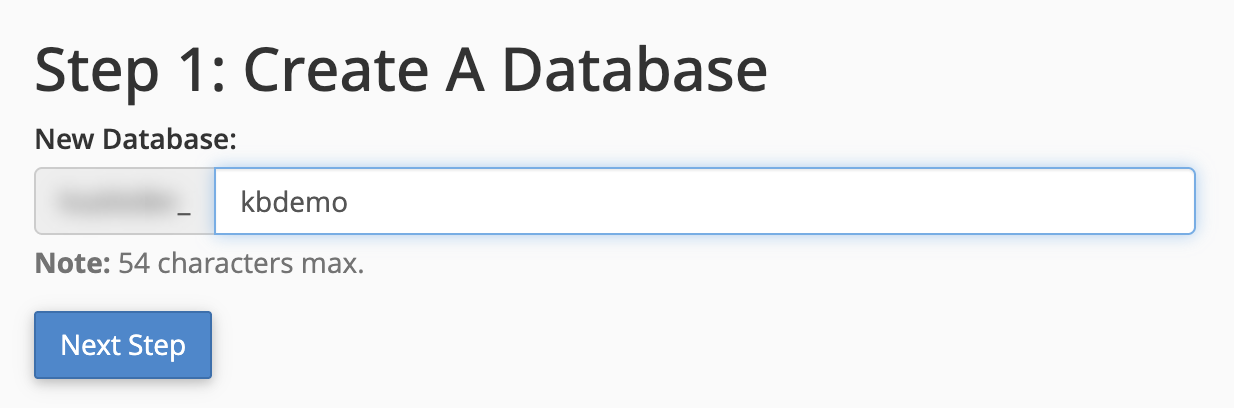
Step 2 - name your database
Type a short, memorable name for the database and click Next Step. cPanel automatically adds your account username as a prefix (shown greyed-out to the left of the box), so the full name becomes something like youruser_kbdemo.
Step 3 - create a database user
Every database needs at least one user before an application can connect to it. Enter a username, then a strong password in both boxes - the Password Generator can create one for you - and click Create User.
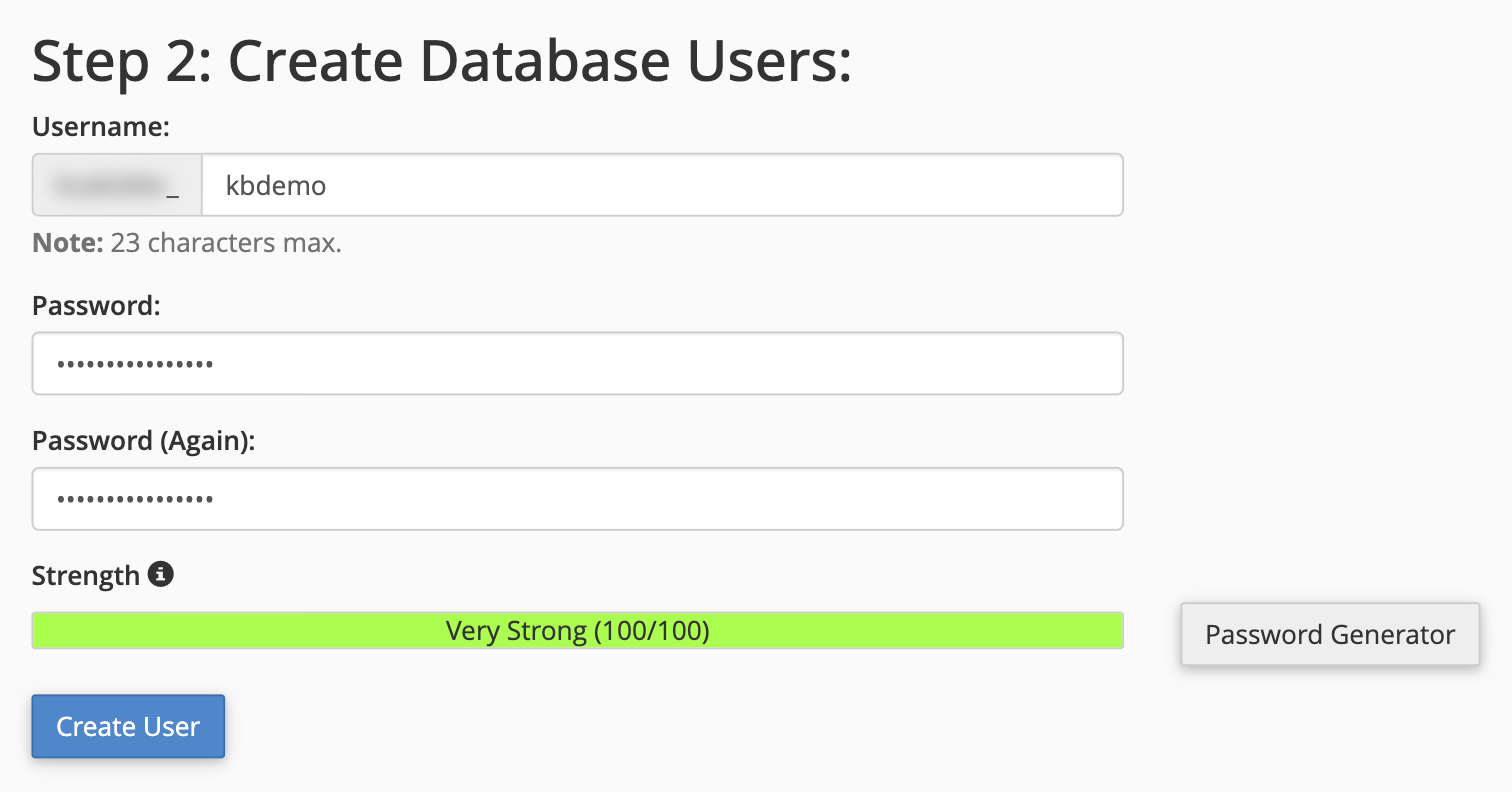
Make a note of the username and password now. You will need them, together with the database name, when you set up your application.
Step 4 - grant the user access
So the user can read from and write to the database, tick ALL PRIVILEGES - this selects every permission in the list - then click Next Step.
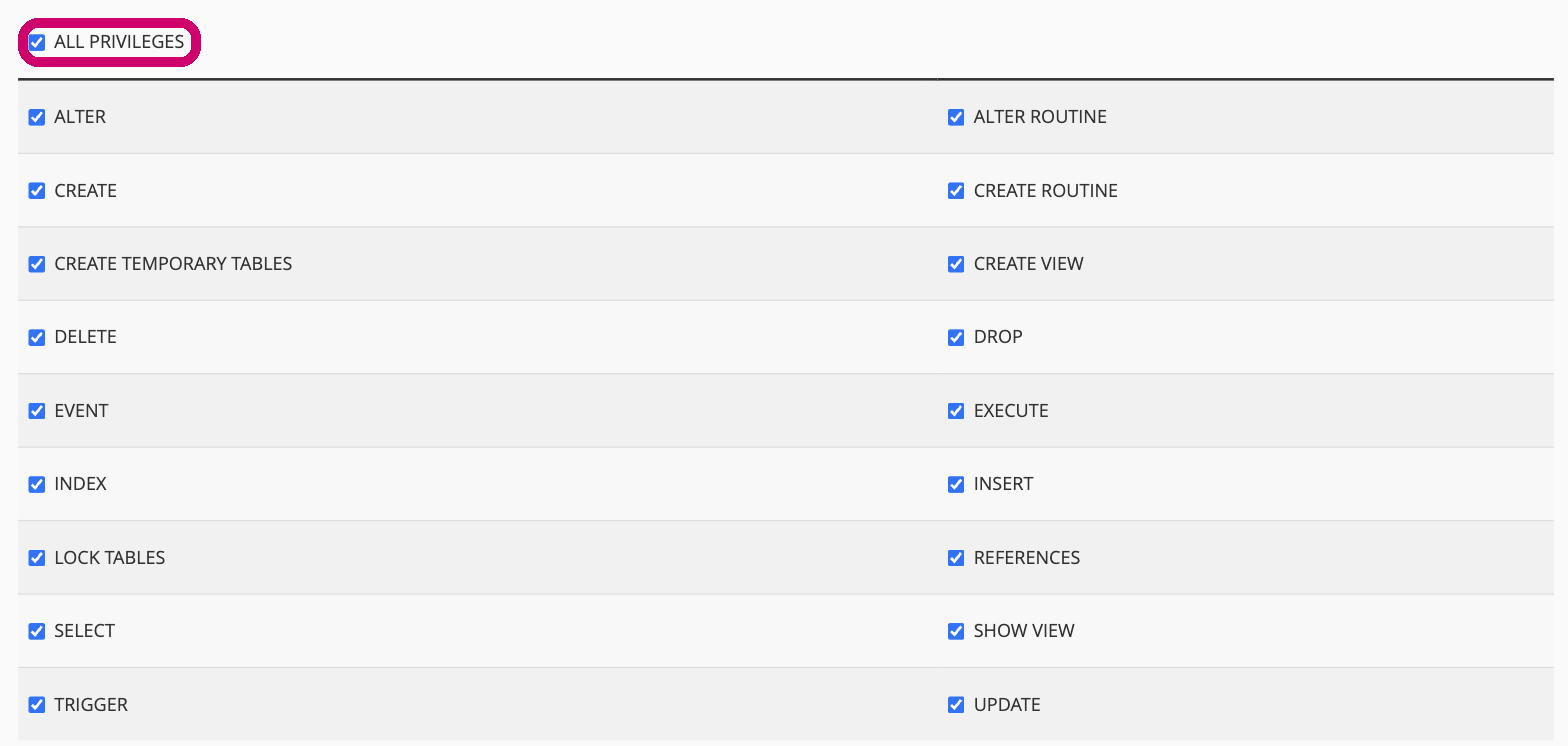
If you would rather grant only certain privileges, leave ALL PRIVILEGES unticked and select just the individual permissions you need instead.
You are done
cPanel confirms the task is complete and that the user has been added to the database. It is now ready to use.
Keep these three connection details to hand:
- Database name - your account prefix plus the name you chose, for example
youruser_kbdemo - Database user - for example
youruser_kbdemo - Password - the one you chose in Step 3
Enter them wherever your application asks for its database settings, usually in a configuration file or an installer screen. On Kualo shared hosting the database host is almost always localhost.
Where to go next
- To browse your database, create tables or run queries, see getting started with databases in phpMyAdmin.
- To manage the databases and users on your account later - changing passwords, adjusting privileges or removing them - use the Manage My Databases tool in cPanel.
- If your website later shows an "Error establishing a database connection" message, work through how to fix a database connection error.
If you get stuck at any stage, open a support ticket and our team will be glad to help.