On this page
Configuring your email settings on your iPad
A walkthrough of the key email settings available in the iPad Mail app.
The iPad Mail app gives you a range of options to control how your email looks and behaves. Here is a quick guide to the most useful settings.
Open the Mail settings
-
Locate and tap the Settings icon on your home screen. Its position may vary depending on how you have arranged your apps.
-
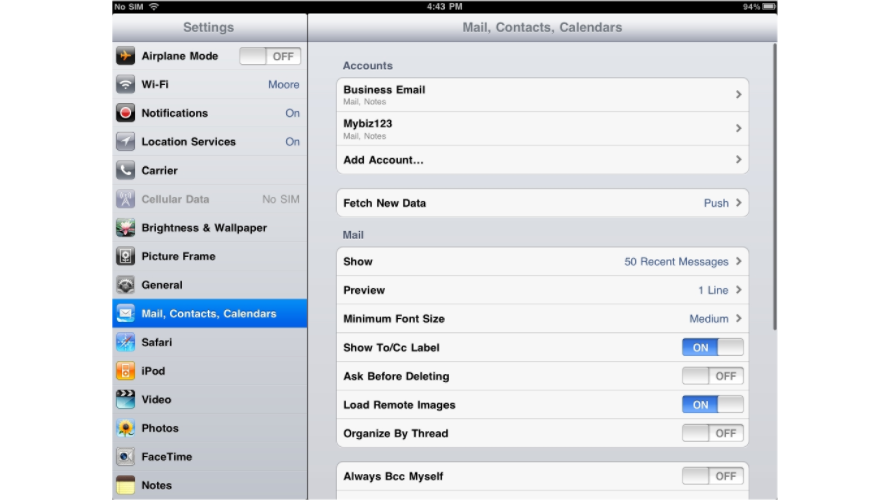
Scroll down and tap Mail. This is where you can adjust all your Mail app preferences.

Fetch new data
-
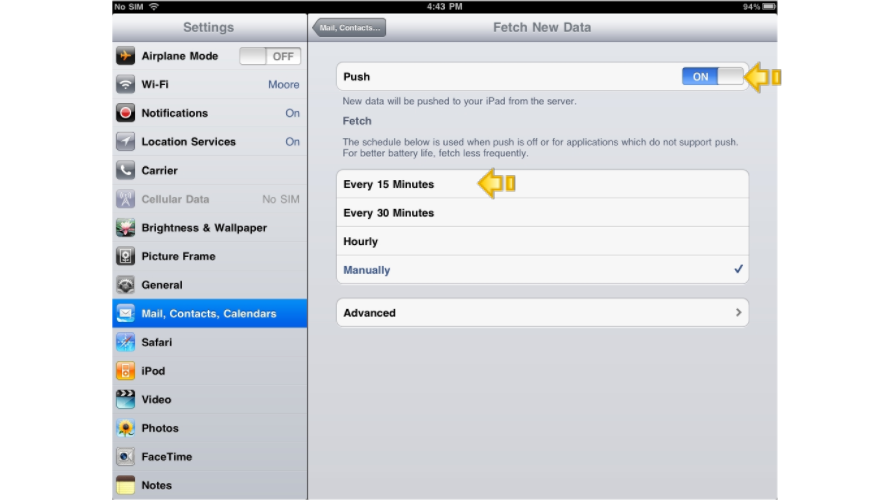
Tap Fetch New Data. If your email service supports Push, you can enable it here so new messages arrive immediately. If not, you can set the app to fetch email at regular intervals - every 15, 30, or 60 minutes - or only when you open the app manually.
Message display options
-
Return to the main Mail settings screen and tap Show.
-
Choose how many recent messages to display in your inbox at one time.

-
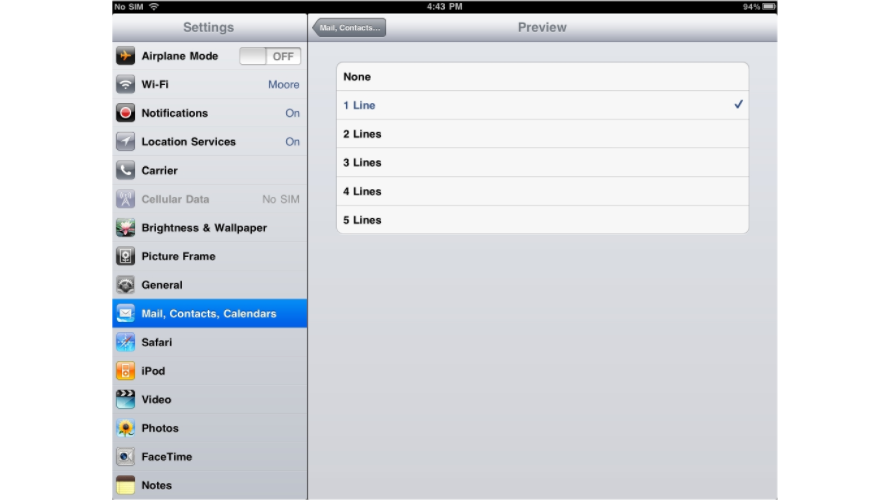
Set how many Preview lines appear beneath each message subject in the message list.
-
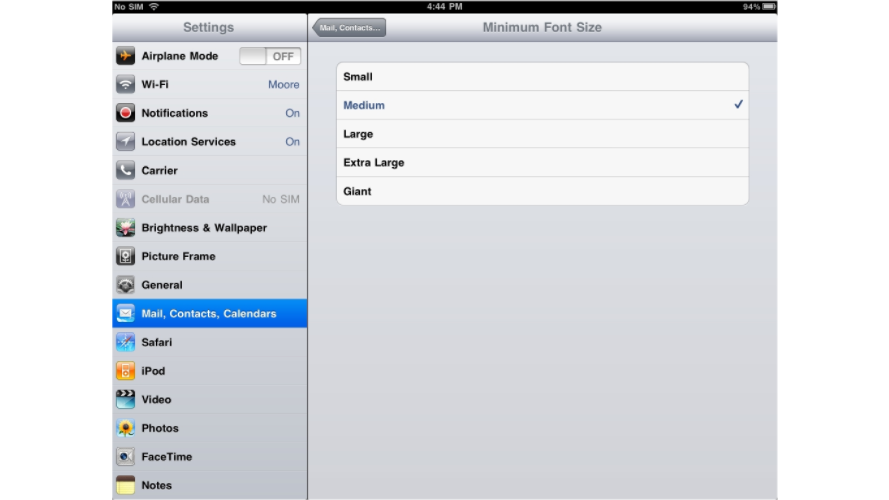
Adjust the Minimum Font Size to make message text easier to read.
-
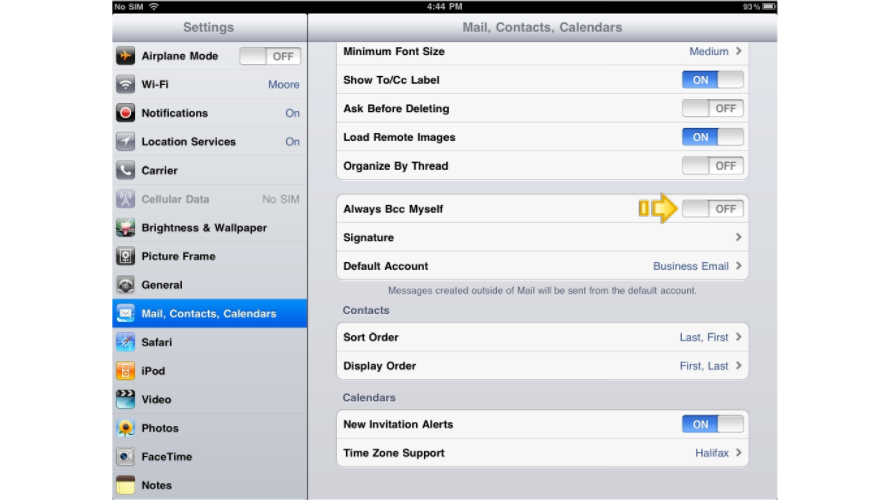
Choose whether to show To and CC labels in the message list. You can also turn on Always Bcc Myself to automatically send a copy of every outgoing message to your own address.
Signature and default account
-
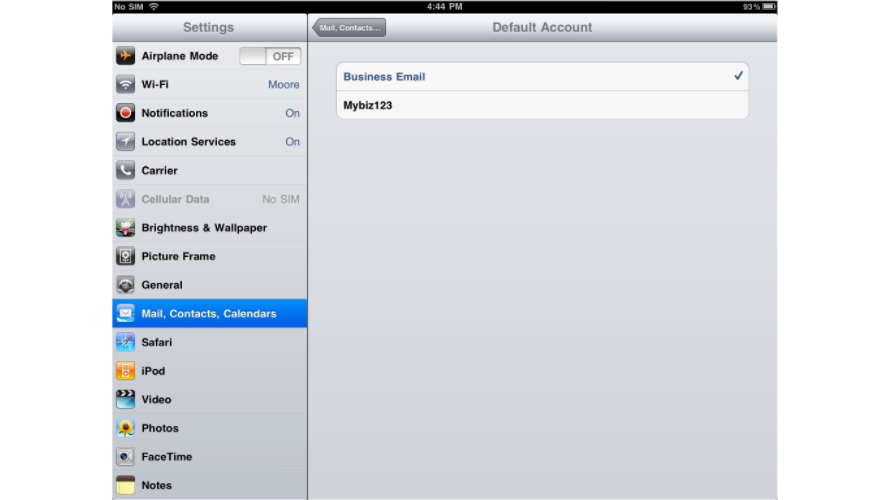
Scroll down to set your email Signature, and if you have more than one account configured, choose which one is your Default Account for new messages.

Most Mail preferences take effect immediately - you do not need to restart the app after making changes.