On this page
Creating staging websites with WP Toolkit
Use WP Toolkit to create a staging site and test changes safely before pushing them to your live WordPress site.
Picture this: you spot a shiny new plugin, or you have a backlog of updates so large that running them blind feels like a gamble. Installing untested changes directly on a live site - what some call the "cowboy coder" move - can mean broken functionality, lost data, or a total site crash. A staging site is the smarter alternative.
Think of a staging site as your website's safe zone: an identical copy where you can test plugins, run updates, or experiment with new features without touching the live site. It is like rehearsing before the big show - you work out all the kinks before anything goes public.
Before you start
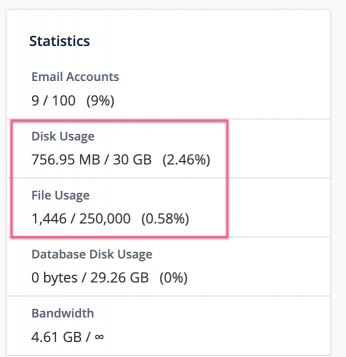
Creating a staging site makes an identical clone of your live site, so you need enough free disk space and inodes (file capacity) to hold a second copy.
If your disk or inode usage is already above 50% - which you can check from the stats panel on the cPanel home screen - clean up unnecessary files first, or consider upgrading your plan.
How to create a staging site
-
Log in to cPanel and open WP Toolkit from the left-hand menu.
-
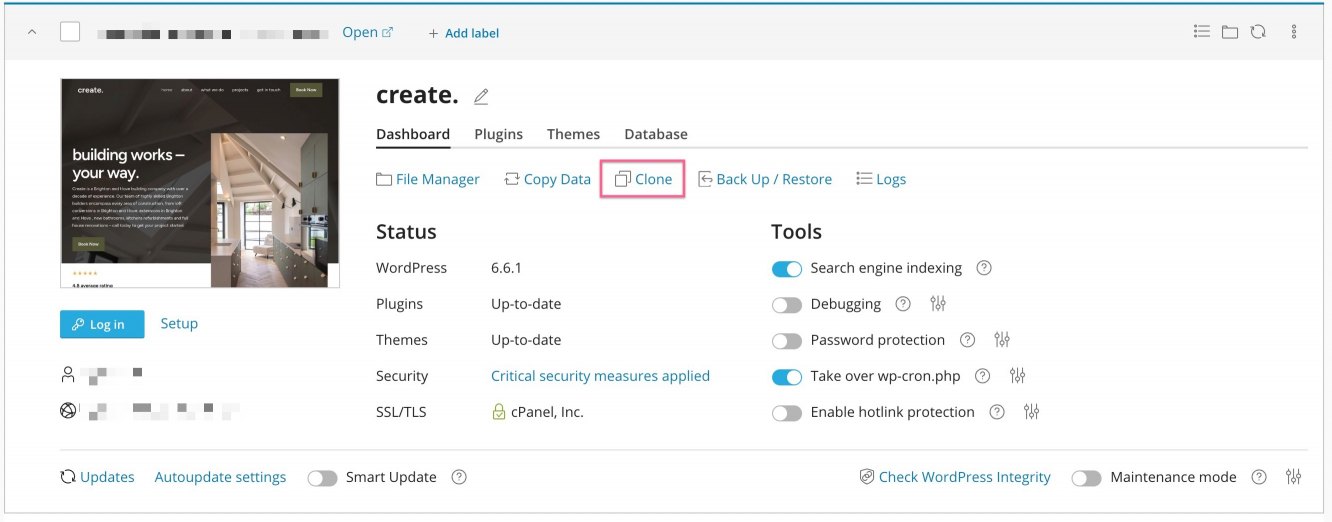
Locate your site in the WP Toolkit dashboard and click Clone.
-
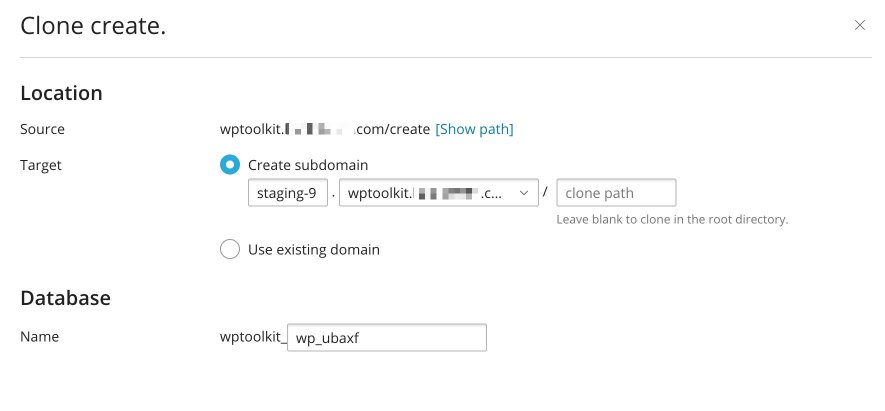
Specify a subdomain for the staging site. WP Toolkit will create the subdomain automatically.
-
Set a database name if you want something meaningful, or leave the auto-generated name as-is.
-
Click Start. WP Toolkit will copy all files and the database to the new subdomain. This may take a few minutes depending on the size of your site.
-
When the process finishes, click Close. You now have an exact copy of your site ready for testing.
Potential issues and considerations
- Resource limits - if your site uses 1 GB of disk space, you need at least another 1 GB free for the staging copy.
- Database permissions - in rare cases, cloning can fail if the database user lacks certain privileges, such as LOCK TABLES.
- Environment differences - WP Toolkit does not clone server-level settings such as PHP versions or SSL certificates. If your live site uses a specific PHP version, replicate that setting manually on the staging subdomain. SSL certificates may also need to be issued separately for the new subdomain.
- Remote DNS - if you are not using Kualo's nameservers and are managing DNS through a service such as Cloudflare, the A record for the staging subdomain will not be created automatically. You will need to add it manually so the subdomain resolves correctly.
- Edge cases - some plugin or theme settings may not transfer perfectly, so check the staging site thoroughly before relying on it.
Syncing changes from staging to live
Once you are happy with your changes on the staging site, use the Copy Data feature to push them to your live site.
-
In WP Toolkit, navigate to your staging site and click Copy Data.
-
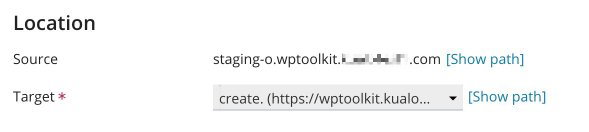
In the Location section, confirm that the staging site is set as the source and your live site is set as the destination.
-
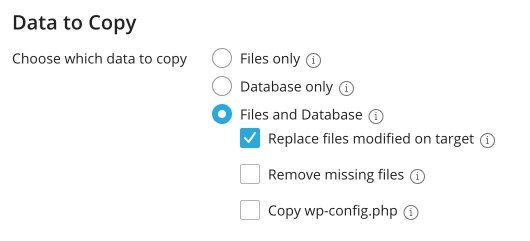
Choose what to copy - Files only, Database only, or Files and Database.
- If you changed plugins or themes, copying files is usually sufficient.
- Be careful when copying the database if your live site has received new content, comments, or orders since you created the staging site - overwriting the database will remove that new data.
- The Replace files modified on target option overwrites live-site files with staging versions.
- The Remove missing files option deletes files from the live site that you removed on staging - useful if you uninstalled a plugin or theme.
-
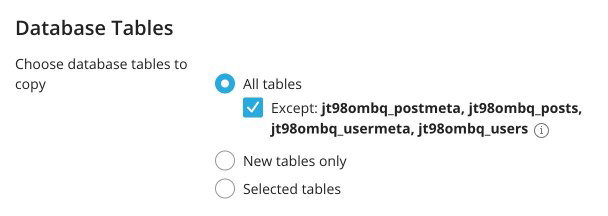
Select which database tables to copy: All tables, New tables only, or Selected tables.
For e-commerce sites, avoid "All tables" unless you are certain - it will overwrite recent orders and customer records. The default selection excludes the postmeta, posts, usermeta, and users tables to protect frequently changing data. Adjust the selection to suit your needs.
-
Leave Create a restore point checked. This saves a backup of your live site before any changes are applied, so you can roll back if something goes wrong. You will need enough free disk space to store it.
Finalising and cleaning up
After syncing, browse your live site and confirm everything works as expected. If you run into problems, restore from the backup created in step 5 above.
When you no longer need the staging site, delete it from WP Toolkit to free up disk space and inodes. Note that WP Toolkit removes the files and database, but the staging subdomain itself will remain - you can delete that separately from cPanel if needed.
A staging site takes only a few minutes to set up and can save you hours of recovery work. Whether you are fixing code, running updates, or trying out a new feature, test it on staging first and keep your live site safe.