On this page
How to integrate Redis into WordPress
Connect Redis to WordPress using LiteSpeed Cache or W3 Total Cache to speed up page loads by caching database queries in memory.
Redis is an in-memory data store that can dramatically speed up your WordPress site by caching database query results. This article explains how it works and how to connect it to WordPress. It assumes you have already set up Redis in cPanel.
How caching works
The first time a WordPress page loads, the server runs a database query to build the page. Redis remembers that query result in memory. The next time any visitor loads the same page, Redis serves the result directly - no database query needed.
This implementation uses Redis as a persistent object cache with no expiration. Here is what that means in practice:
- SQL query results are stored in memory, so pages load faster and the database handles less work.
- If a query result is not yet cached, the database provides it and Redis stores it for next time.
- If data changes in WordPress - for example, a new post is published - Redis invalidates the affected cached value so visitors never see stale content.
Redis vs. Memcached
Memcached is another popular caching option, but Redis is the better choice for most WordPress setups. Redis supports everything Memcached does, plus a much larger feature set - including data persistence, which means cached data survives a server restart.
Option 1: LiteSpeed Cache (recommended)
If you are using the LiteSpeed Cache plugin, configure Redis directly inside the plugin rather than installing a separate caching plugin.
- Log in to your WordPress Admin Dashboard.
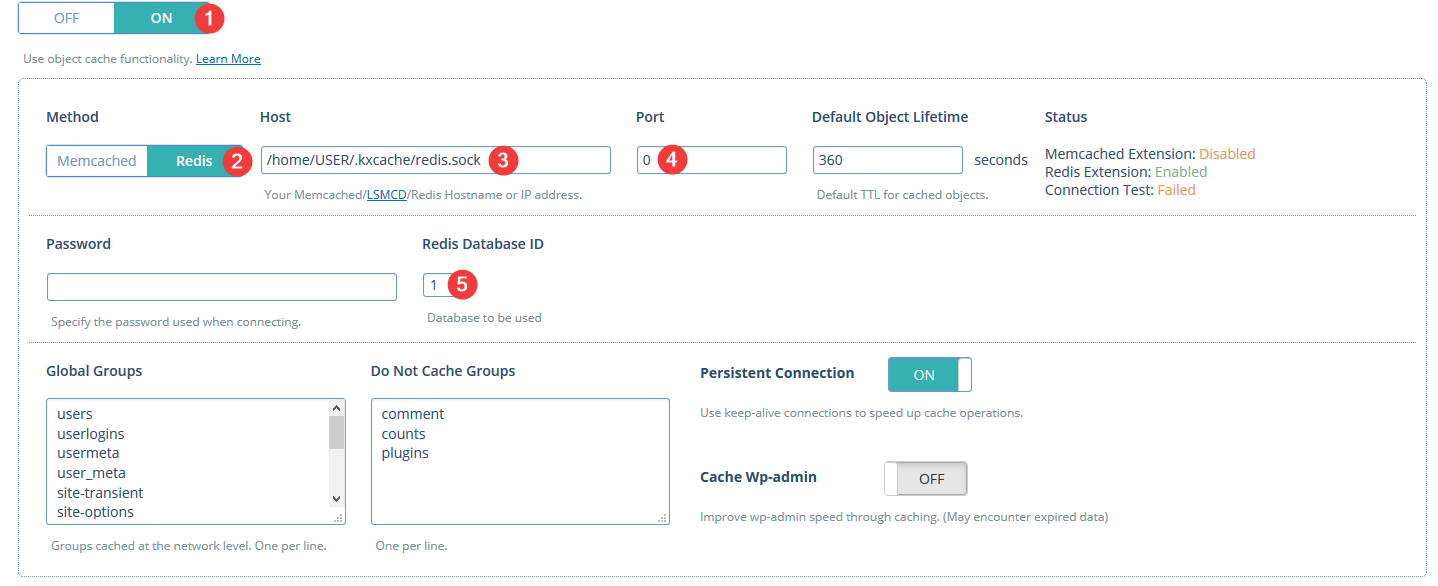
- Go to LiteSpeed Cache > Settings > Cache > Object Cache.
- Enter your Redis hostname and port as shown in your cPanel Redis configuration.
- Save your changes.
Full details on LiteSpeed Cache object caching options are available in the LiteSpeed documentation.
Option 2: W3 Total Cache
If you are not using LiteSpeed Cache, W3 Total Cache is a solid alternative for connecting Redis to WordPress.
Install and activate W3 Total Cache
- Log in to your WordPress Admin Dashboard.
- Go to Plugins > Add New.
- Search for W3 Total Cache.
- Click Install Now, then Activate.
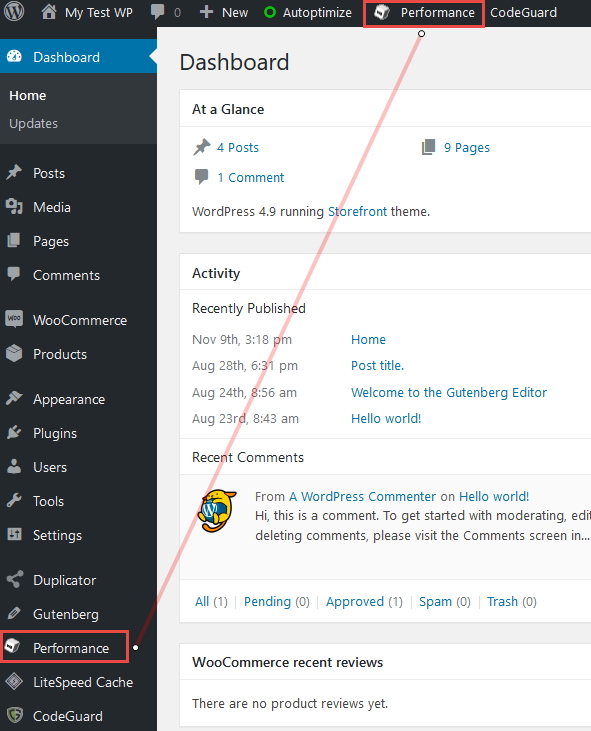
Once activated, W3 Total Cache appears as Performance in the main admin menu.
Enable Redis for database and object cache
- Go to Performance > General Settings.
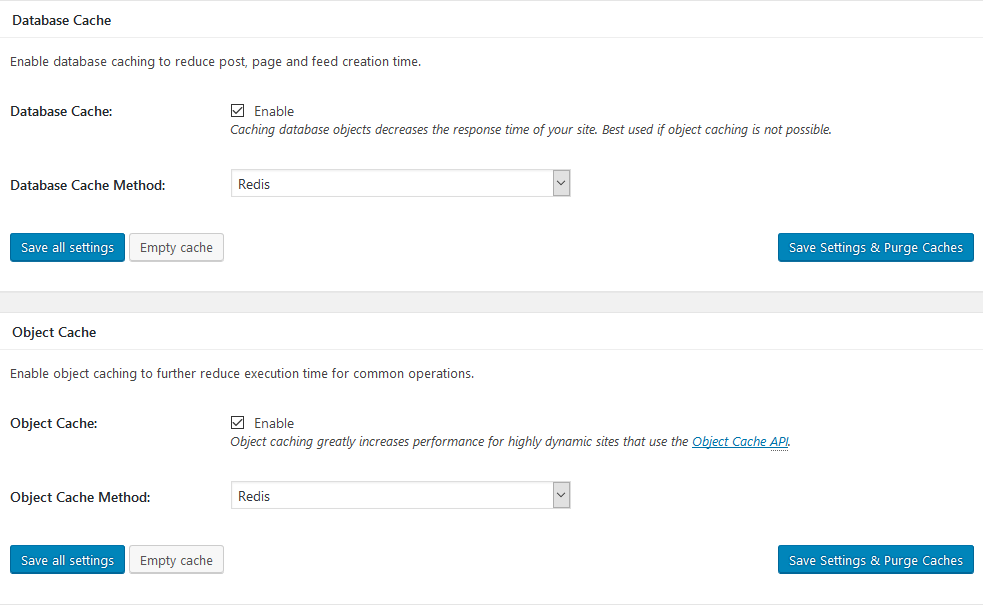
- Enable Database Cache and set the cache method to Redis.
- Enable Object Cache and set the cache method to Redis.
- Click Save all settings.
If Redis does not appear as a cache method option, you have not yet set up Redis in cPanel.
Configure the database cache
- Go to Performance > Database Cache.
- Enter your Redis hostname or socket address exactly as it appears in cPanel.
- Enable Use persistent connection.
- Set a unique Redis Database ID for this cache type (for example,
1). - If you use WooCommerce, add
_wc_session_to the Ignored query stems field. - Save your settings.
Configure the object cache
- Go to Performance > Object Cache.
- Enter the same Redis hostname or socket address.
- Set a different unique Redis Database ID from the one used for the database cache (for example,
2). - Save your settings.
If you need further help, contact the Kualo support team.