On this page
How to configure the Wordfence plugin
Configure the Wordfence plugin correctly to dramatically reduce the risk of your WordPress site being compromised.
Wordfence is our recommended security plugin for WordPress. With it properly configured, the likelihood of your site being hacked is dramatically reduced - but it has a lot of options, and the defaults are not always ideal. This guide walks you through the settings we recommend.
Before you start
Install Wordfence from the WordPress plugin directory if you have not already done so. Once activated, go to Wordfence > All Options in the WordPress admin sidebar.
Recommended settings
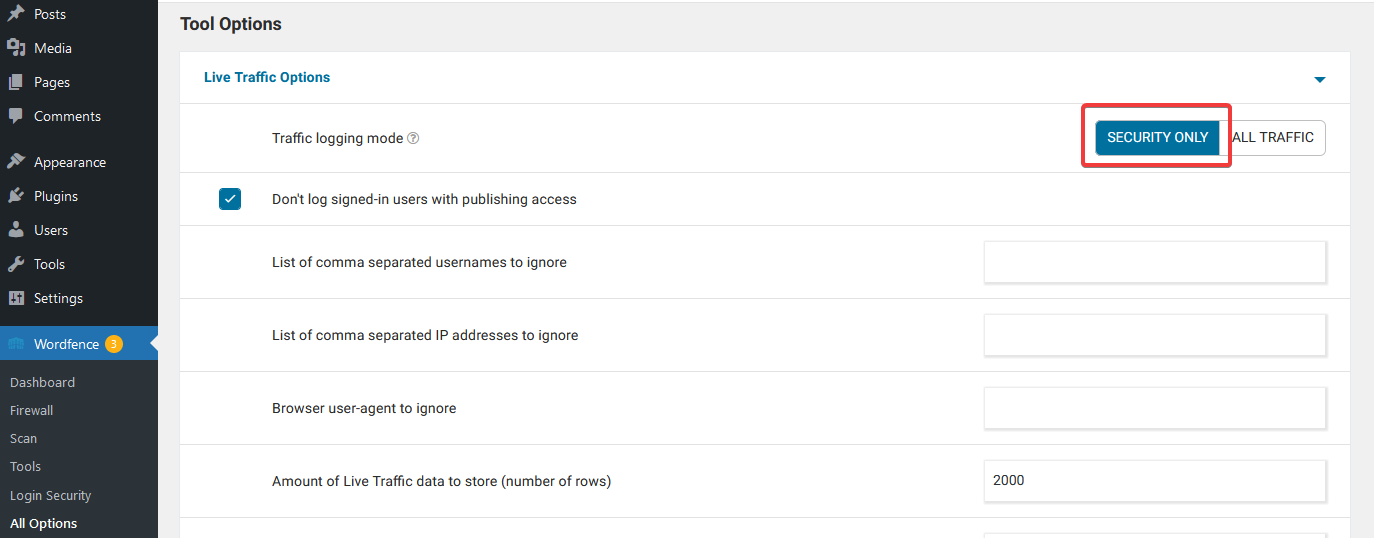
1. Set traffic logging to security only
Go to Tools > Live Traffic Options and set Traffic logging mode to Security only.
The live traffic view is a useful feature, but it adds overhead - particularly on busier sites. It is not essential for security, so we strongly recommend turning it off.
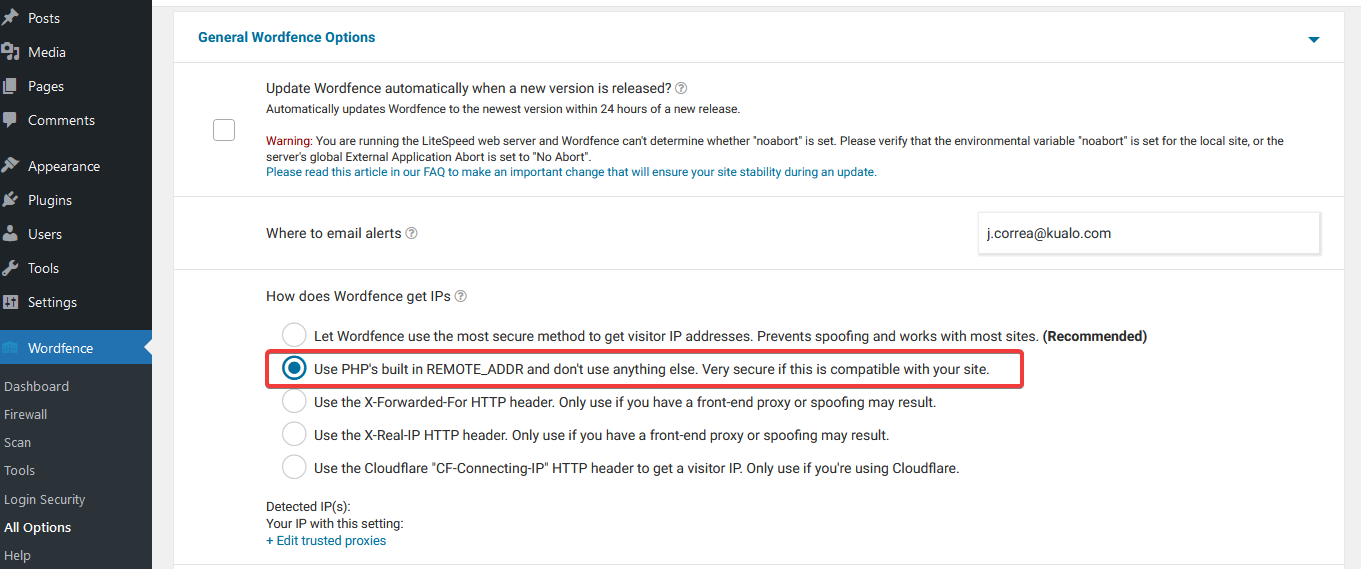
2. Set how Wordfence detects IP addresses
Go to General Wordfence Options > How does Wordfence get IPs and select Use PHP's built-in REMOTE_ADDR.
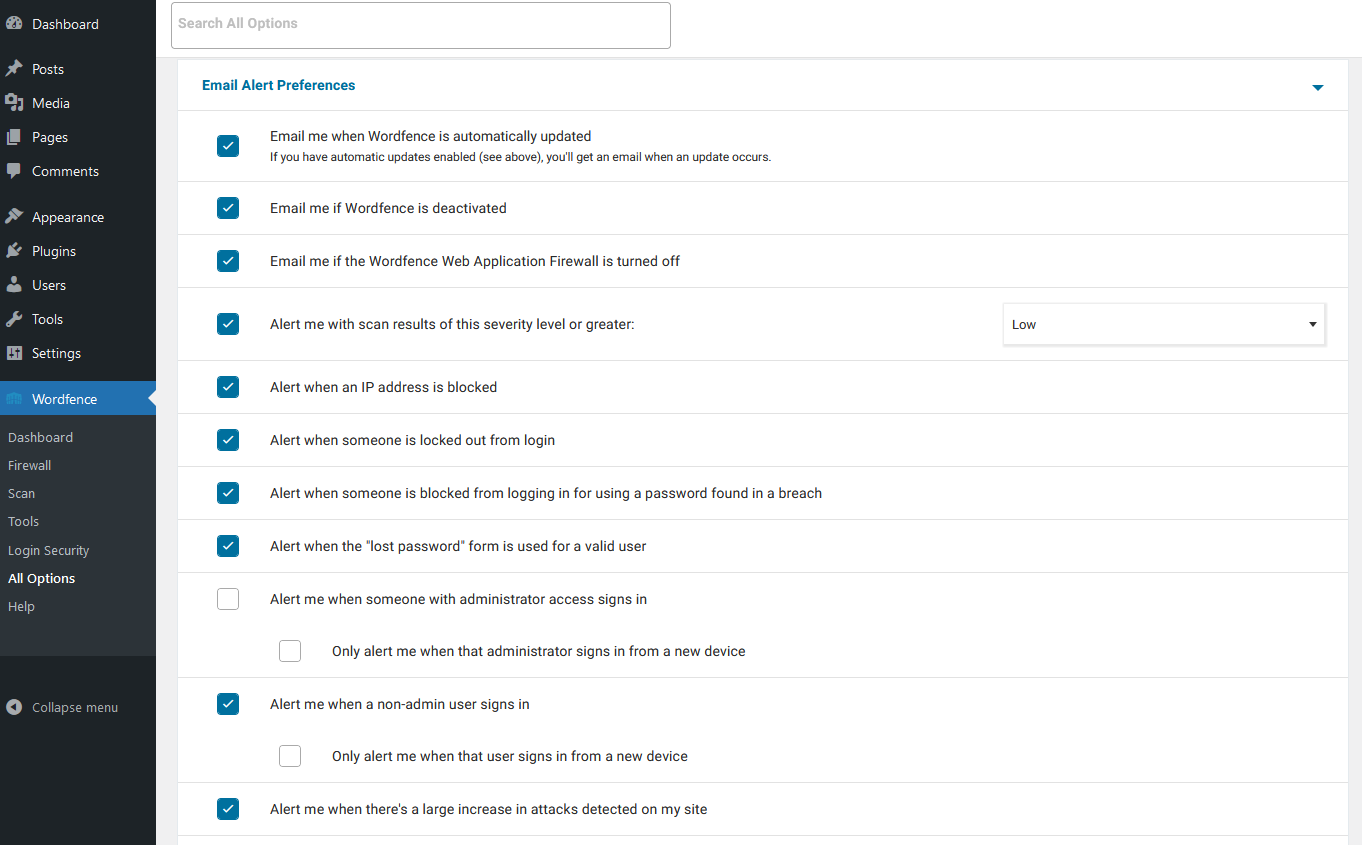
3. Configure email alert preferences
Go to Wordfence Global Options > Email Alert Preferences and enable all options except Alert me when someone with administrator access signs in.
That last alert is overkill for most sites and will generate unnecessary email noise if you log in regularly.
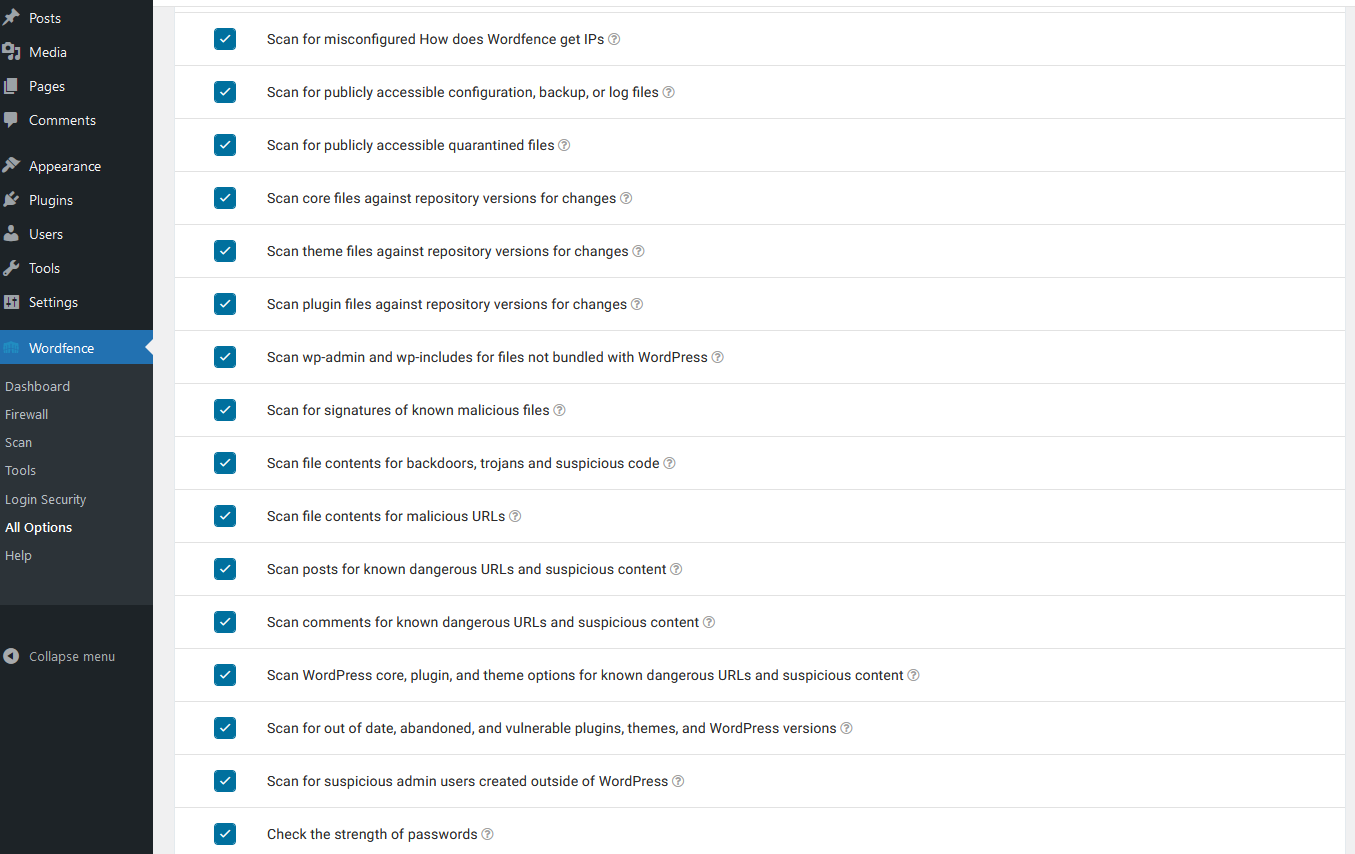
4. Enable all scan options
Go to Scan Options > General Options and enable all available scan types.
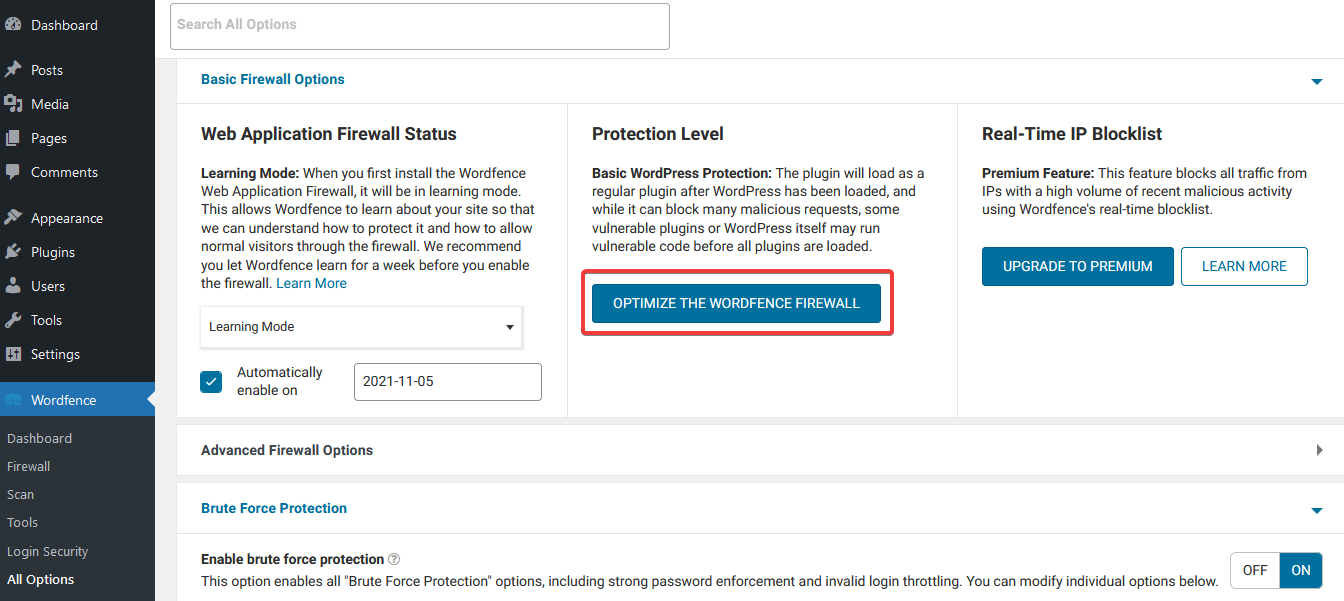
5. Optimise the firewall
Go to Firewall Options > Basic Firewall Options and click Optimize the Wordfence firewall. Follow the on-screen instructions to add the required rules to your site's .htaccess file.
6. Allowlist your own IP address
Go to Firewall Options > Advanced Firewall Options and enter your public IP address in the Allowlisted IP addresses that bypass all rules field. This ensures your own connection is never blocked by the firewall.
If you are not sure what your IP address is, visit kualo.com/whatismyip to find out.
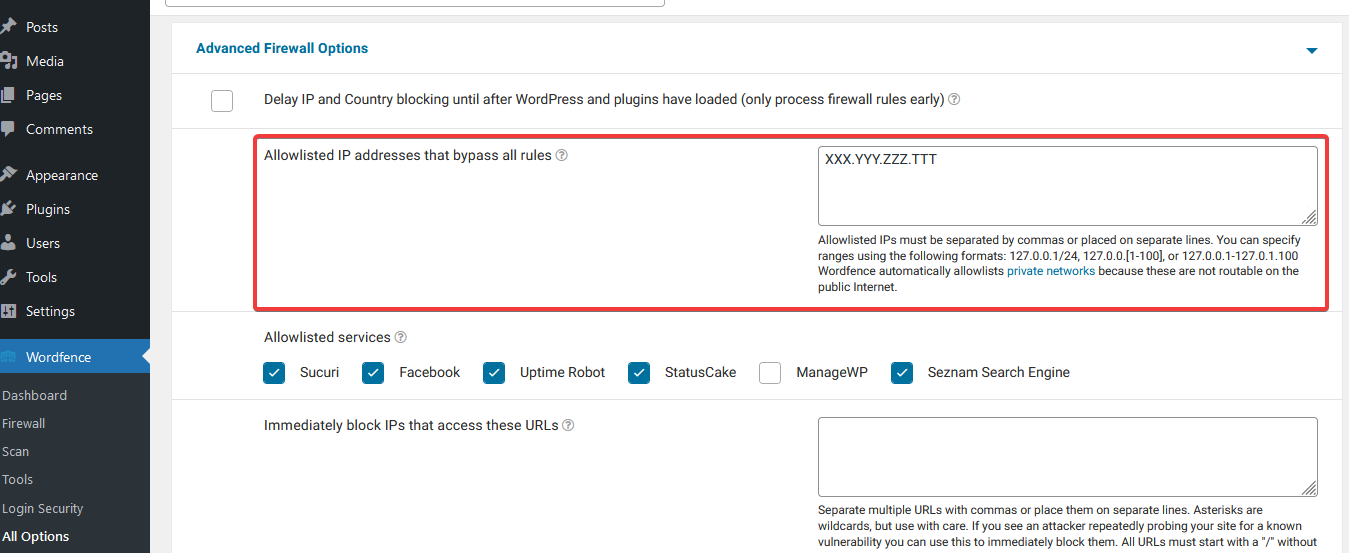
Your home or office IP address may change periodically if you are on a standard broadband connection. If you ever find yourself blocked, check whether your IP has changed and update this field.
Save your settings and run a scan
Click Save Changes once you have finished configuring the options above.
Next, run an initial scan to check the current state of your site:
- In the WordPress sidebar, go to Wordfence > Scan.
- Click Start a new scan.
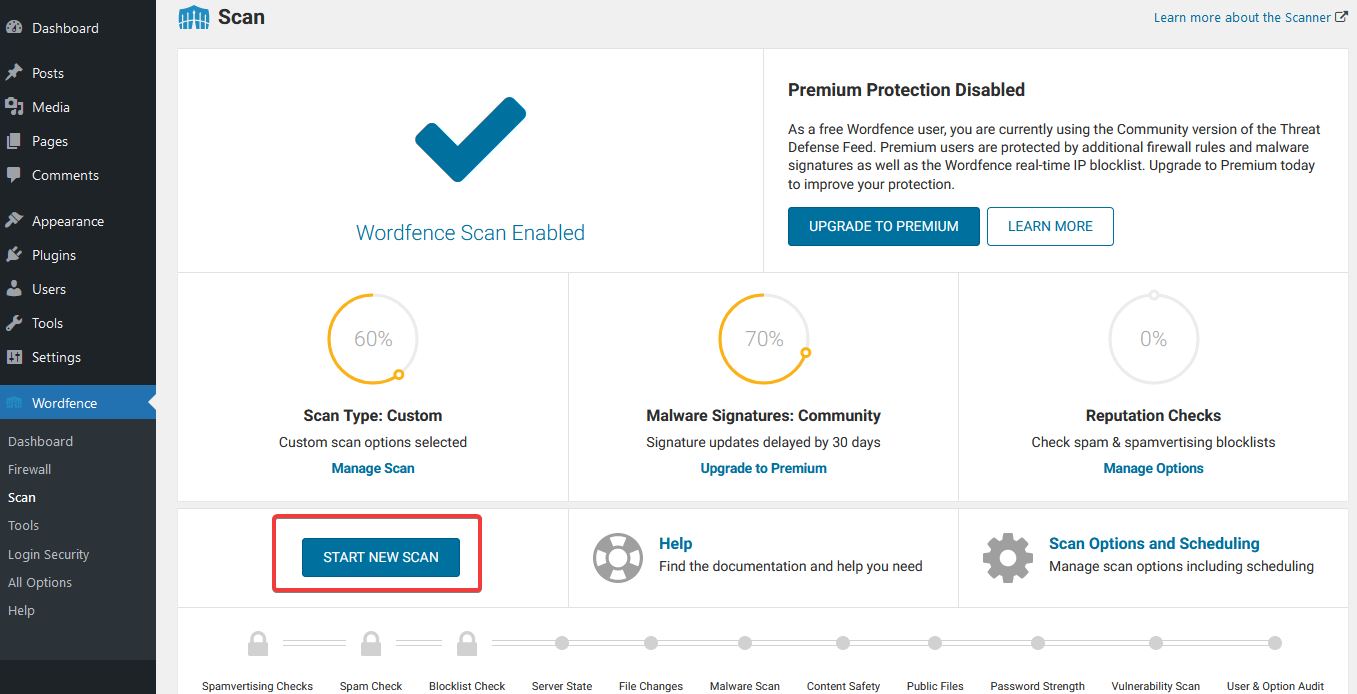
Wordfence will analyse your files, plugins, and themes. Any issues found - such as outdated plugins or suspicious files - will be listed in the results panel. Follow the recommendations in the scan report to resolve them.