On this page
Understand email automation
How automations work in MailMachine: triggers, conditions, actions, the editor, and reading your stats.
Automation links something a contact does - subscribing to a list, clicking a link, reaching a date - to a sequence of steps that MailMachine carries out for you, automatically. Set it up once and it runs in the background: a welcome email moments after someone subscribes, a follow-up a few days later, a reminder if they haven't opened. This guide explains how to find your automations and how the editor works.
Why automation is worth your time
Automation handles the repetitive, time-sensitive jobs that are easy to forget and tedious to do by hand. Done well, it saves you time, cuts mistakes, and gives every new subscriber a consistent, timely experience - all while you get on with something else.
Create an automation
- Click Automations.
- Click the + sign at the top right of the page. You can also start one from the Create button.
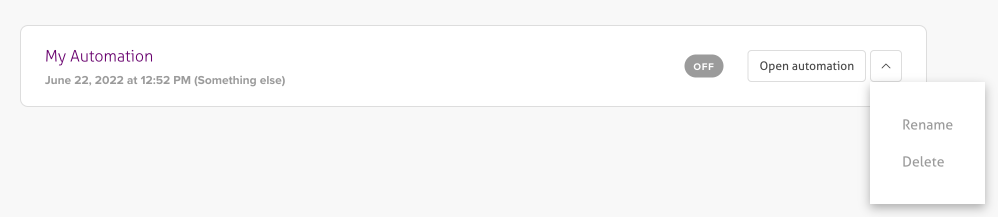
Any automations you've already built appear here too, ready to open, rename or delete.
The automation editor
The editor lays your automation out top to bottom, each step shown as a connected block so you can follow the flow at a glance.
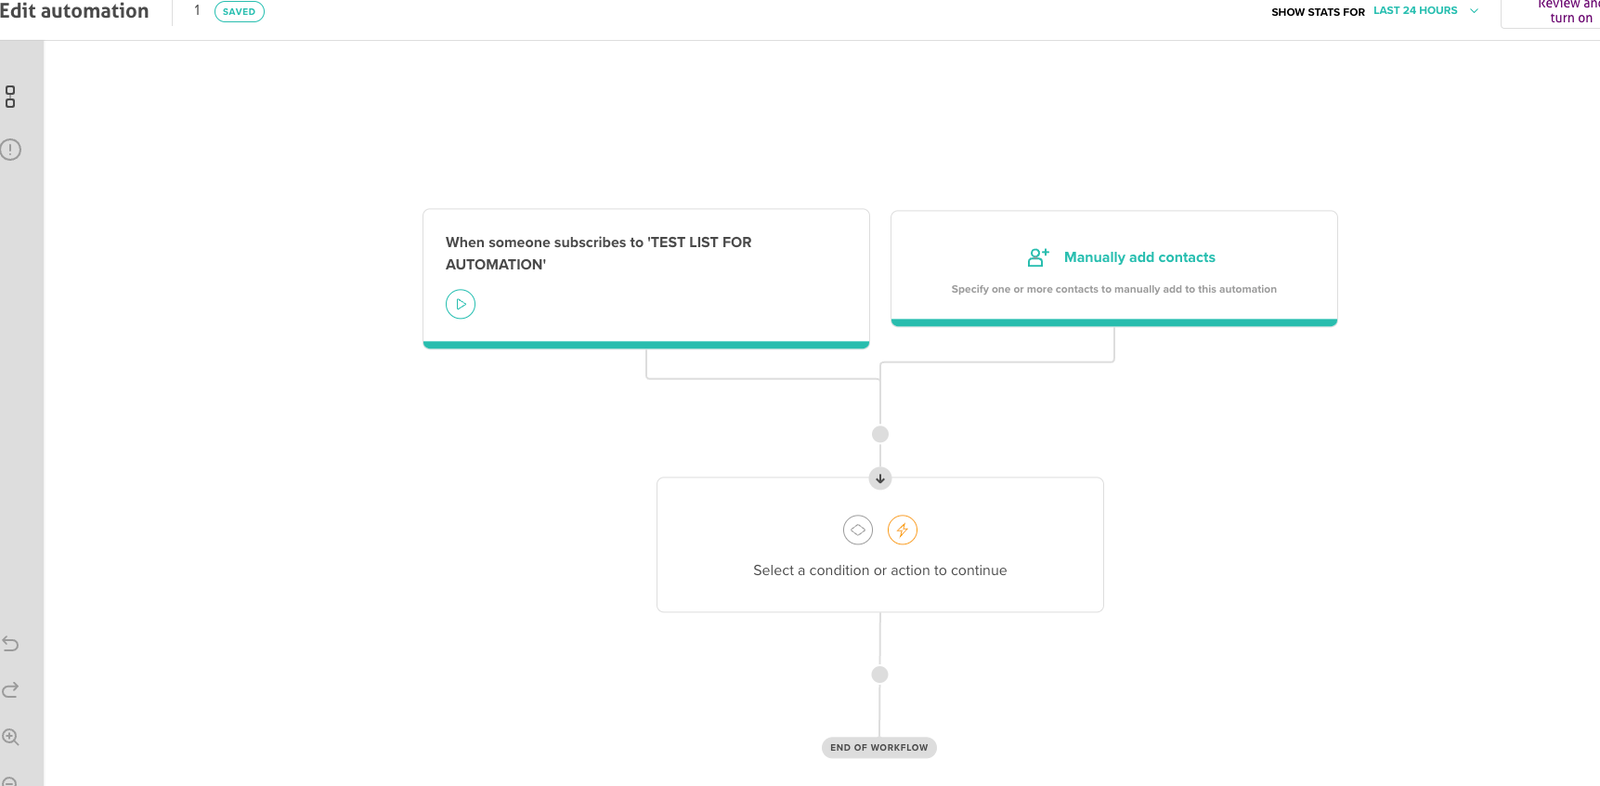
From here you can:
- manually add contacts to the automation
- view statistics for a chosen period
- edit the workflow itself
Conditions and actions
Every step you add is either a condition or an action.
Conditions decide who goes where:
- Delay - wait a set time (seconds, minutes, hours, days or weeks) before the next step.
- If / Else - contacts who match a rule take the Yes path; everyone else takes the No path.
- Path split - divide your subscribers down different routes.
Actions do something. The default action is to send an automated email, which you build in the email designer and configure - subject line and so on - in the deployment settings.
Activate your automation
When you're happy, review and activate it. MailMachine will tell you if anything still needs fixing before it can go live.
Read your automation's statistics
Use the period dropdown to choose a date range and see how your automation is performing. Click any email in the flow to open a side panel with its open, click, unsubscribe, delivery and bounce rates - exactly what you need to refine the sequence over time.
Duplicate an automation to edit it
Active automations can't be edited directly - you duplicate them and edit the copy:
- Click the down arrow at the top right.
- Choose Rename, Delete or Duplicate.
Duplicating gives you an editable copy to change as you like, leaving the original running until you're ready to switch.
Troubleshooting
The automation doesn't start - check the toggle is set to ON, the trigger conditions are configured, and the connected list actually has active subscribers.
You can't edit an active automation - duplicate it, edit the copy, then deactivate the original and activate the new version. Test with a small segment first.
Statistics don't show - allow 24-48 hours for figures to populate, and make sure the selected period covers when the emails actually went out.
The email designer won't load - clear your browser cache, switch to Chrome or Firefox, and save often.
Workflow validation errors - every email block needs content, every branch needs an endpoint, and every condition needs its required fields filled in.
If an automation still won't behave, open a support ticket and we'll help you trace it.