On this page
Optimising your website
Follow these nine steps to diagnose and improve your website's speed, covering PHP, caching, databases, and more.
Offering a smooth browsing experience is essential - an optimised site delights visitors, improves search engine rankings, and reduces environmental impact. This guide walks you through nine actionable steps to get there. If you use WordPress, treat these as your starting point before moving on to our in-depth WordPress optimisation guide.
Is my site actually slow?
Before diving into fixes, it helps to understand what kind of slowness you are dealing with.
Frontend vs backend
- Frontend - what visitors see. This is the most important area to optimise.
- Backend - the admin area where you manage your site. It is common for the backend to be slower than the frontend, but it can still be improved.
How to test
- Incognito window - open your site in a private browser window while logged out. This tells you whether the slowness affects the frontend, the backend, or both.
- Google PageSpeed Insights - an excellent tool for frontend analysis, giving separate scores for mobile and desktop performance.
Our test environment
To illustrate what is possible, we set up a test WordPress site with a stock theme and page builder, then ran it through PageSpeed.
Before optimisation
Mobile score: 56
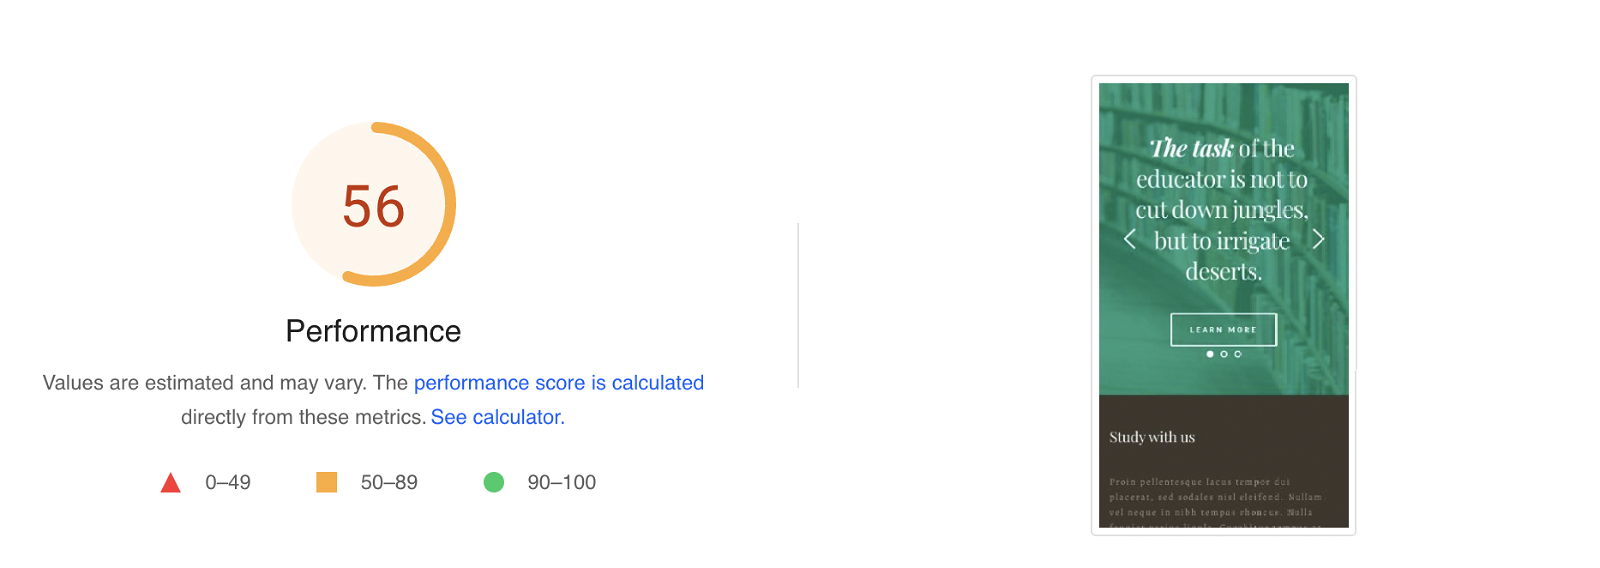
Desktop score: 82

Not terrible, but there is clear room for improvement. Lower scores often point to issues such as too many plugins or a poorly optimised theme.
Why does mobile score lower than desktop?
Google scores mobile and desktop separately because mobile devices typically have slower connections and less processing power, making optimisation more complex.
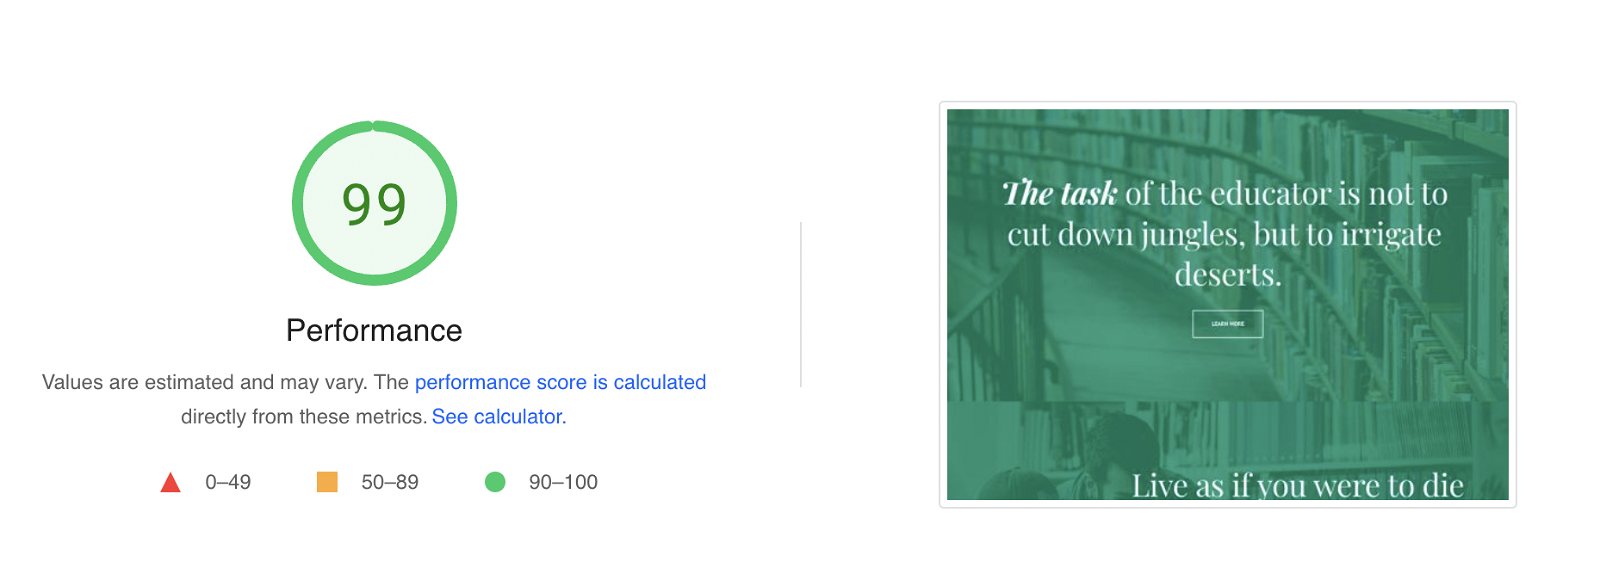
After optimisation
Mobile score: 96

Desktop score: 99
Reading the detailed results
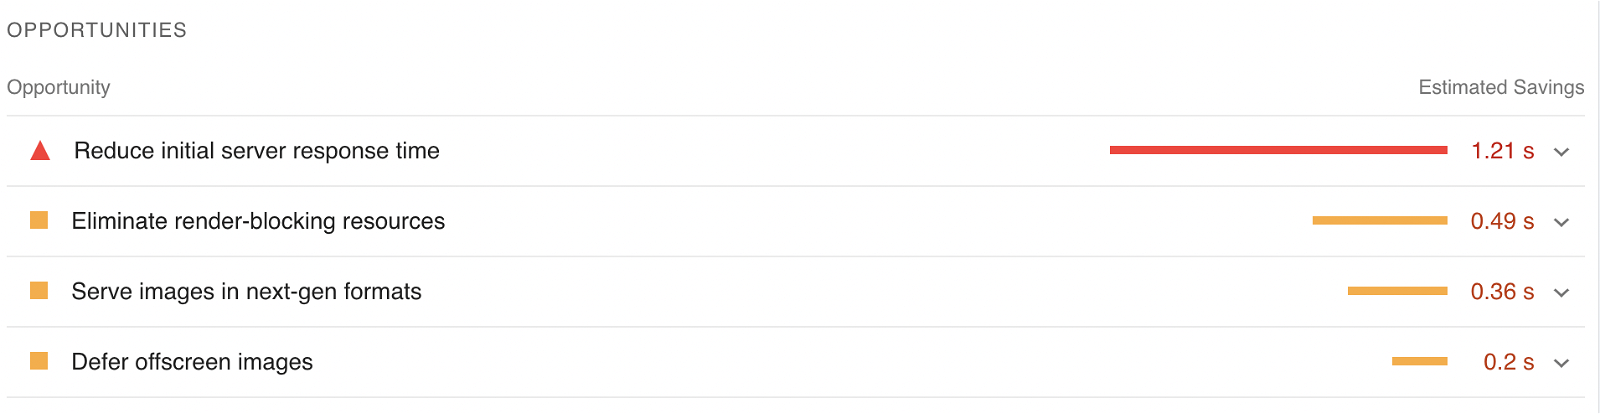
PageSpeed's detailed breakdown pinpoints specific areas for improvement, which may differ between mobile and desktop. Use those pointers alongside this guide - techniques like caching can resolve issues even in complex sites with many plugins or less-than-perfect code.
Ready to get started?
Every site is different, and some will naturally run slower due to complexity. Even so, the steps below can make a significant difference. We recommend reading the guide in full before making any changes.
- Step 1: Keep your website code up to date
- Step 2: Check your PHP version
- Step 3: Make sure OPcache is enabled
- Step 4: Check you are not hitting resource limits
- Step 5: Use caching
- Step 6: Use Redis or Memcached if your application supports it
- Step 7: Use a Content Delivery Network
- Step 8: Use InnoDB rather than MyISAM
- Step 9: Run wp-cron.php as a real cron job (WordPress only)
Step 1: Keep your website code up to date {#step1}
Most website owners know that keeping their code, plugins, and extensions up to date improves security. What is less widely appreciated is that updates also improve speed:
- Platform updates - WordPress, Joomla, Drupal, and similar platforms regularly release new versions that include performance improvements alongside bug fixes.
- Plugins and extensions - updated add-ons often run more efficiently than older versions.
- PHP compatibility - newer PHP versions are significantly faster, but your code must be compatible to take advantage of them. Outdated code can hold back those gains.
Always take a backup before upgrading core software or add-ons. Newer versions can occasionally conflict with other parts of your site.
Keeping your site up to date is not just a security measure - it is a foundation for good performance.
Step 2: Check your PHP version {#step2}
Kualo lets you choose which version of PHP your site runs on, and you can change it at any time via cPanel.
When your account is set up it uses the latest stable version, but newer PHP releases come out regularly. Each new version brings bug fixes, new features, and - critically - speed improvements. PHP 8, for example, is around three times faster than PHP 5.6.
We do not switch you to newer PHP versions automatically because we cannot guarantee your site is compatible. If your code has not been updated in a while, it may rely on an older version, and switching could break things. Before upgrading, check that your plugins and themes support the version you want to move to.
If everything is current, a newer PHP version is very likely to be compatible. If you do spot problems after switching, you can always revert.
Follow our guide on how to manage the PHP version in cPanel for step-by-step instructions.
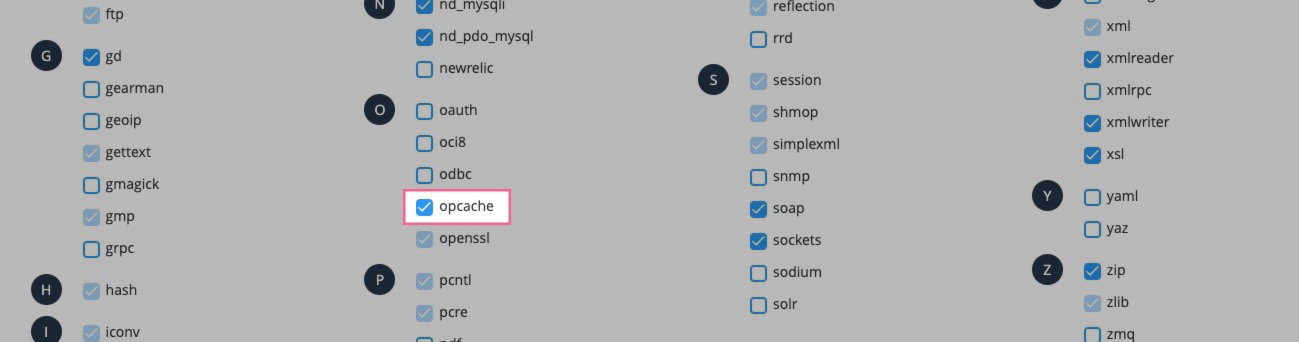
Step 3: Make sure OPcache is enabled {#step3}
OPcache has been available since PHP 7 and makes PHP sites noticeably faster.
To understand why, think of a PHP script as a letter written in English, but your server - a robotic assistant - can only understand a long string of 0s and 1s. Without OPcache, every time a visitor loads a page, the server has to translate that letter into machine code ("opcode") from scratch. It is like re-translating the same letter every single time someone wants to read it.
With OPcache enabled, the translated version is stored on disk. The next time the code runs, the server skips the translation step entirely and goes straight to execution. The cached version refreshes automatically whenever the PHP file changes, and you can also purge the entire OPcache from within cPanel.
If your site is running slowly, check your PHP extensions in cPanel and confirm that OPcache is enabled for the PHP version your application uses.
Step 4: Check you are not hitting resource limits {#step4}
Each Kualo hosting plan allocates specific amounts of server resources - CPU, memory, disk I/O, entry processes, and number of processes. Hitting those limits will slow your site down or cause errors. You can see the limits for each plan on our resource usage policy page.
Here is how each limit affects your site:
| Resource | Effect when limit is reached |
|---|---|
| Memory (RAM) | Error messages or elements failing to load |
| CPU and disk I/O | Server throttles requests, causing slowdowns without obvious errors |
| Entry processes / number of processes | Longer load times and dropped connections under traffic |
You can monitor your usage through the Resource Usage tool in cPanel, which shows whether you have hit any limits in the last 24 hours or over a custom historical period.
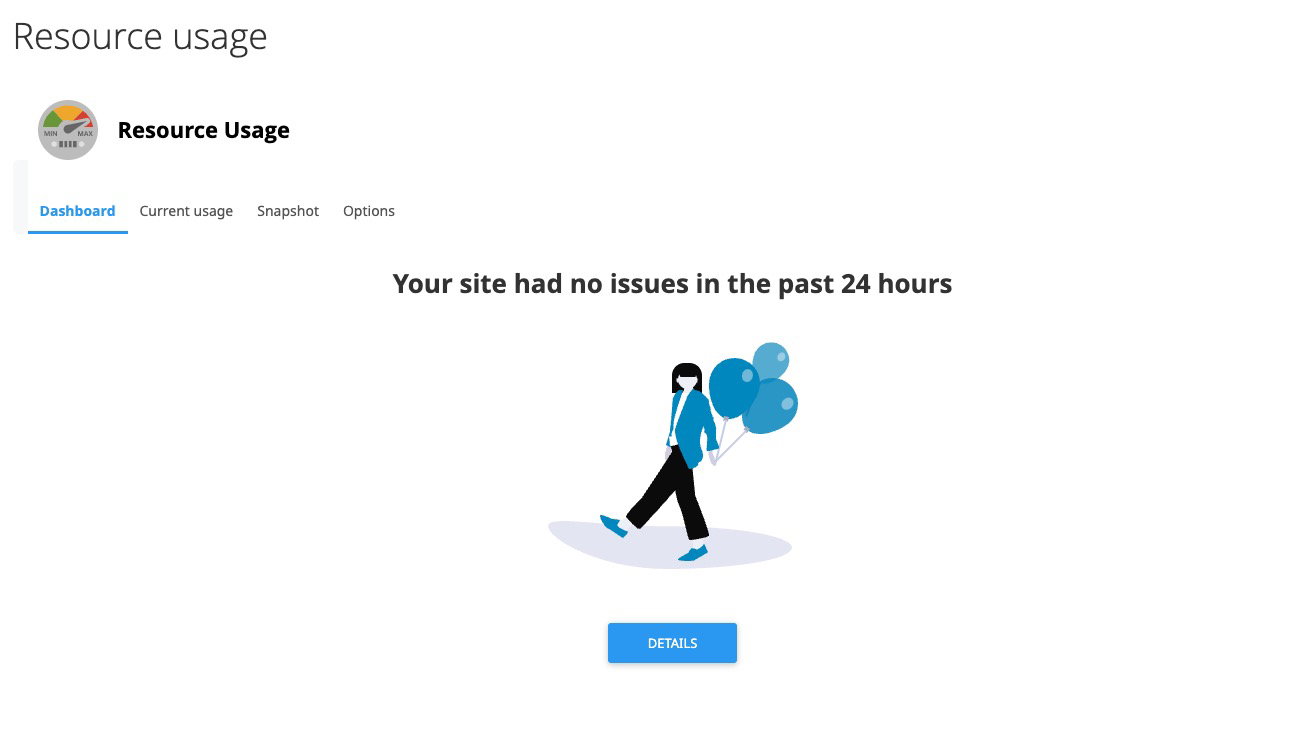
If everything is within limits, you will see a clean summary screen:
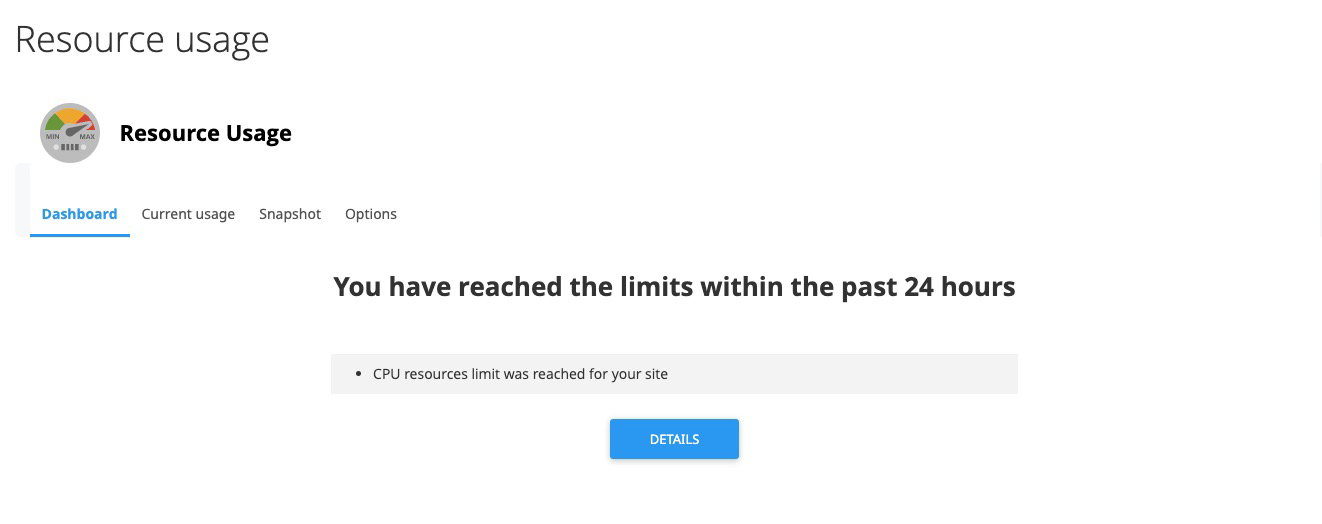
If you have brushed against a limit, the screen will highlight it:
For a full explanation of each resource and how to manage it, see our understanding resource usage in cPanel article.
Step 5: Use caching {#step5}
Caching is the single most effective way to speed up your site and reduce server load. We covered OPcache above - that stores compiled PHP code - but PHP still has to execute on every page request.
When a visitor loads a page, the server runs your site code, queries the database, executes functions, and assembles the resulting HTML. Without caching, that entire process repeats for every single request.
Think of it this way: imagine that every time you wanted to read a book, you had to build a printing press, learn to operate it, print the book, and learn the language before you could start reading. That is what the server has to do without caching - a complex, multi-step task repeated over and over when it does not have to be.
With a page cache in place, the server only does that work the first time a page is accessed. The resulting HTML is stored, and every subsequent request is served straight from the cache. If you update the page, the cache clears automatically and regenerates on the next visit.
A well-configured cache can shave seconds from your load time and dramatically reduce resource usage.
If your site runs on WordPress, Drupal, Joomla, Magento, PrestaShop, MediaWiki, or XenForo, we strongly recommend LiteSpeed Cache. Kualo runs LiteSpeed Enterprise as its web server - one of the fastest web server technologies available - and LiteSpeed Cache integrates directly with it at the server layer, rather than within the application itself. The plugins manage cache purging when you make changes; the actual caching happens at the web server level, which is as fast as it gets.

Using LiteSpeed Cache will not only make your site faster but will also allow it to handle significantly more concurrent visitors.
Step 6: Use Redis or Memcached if your application supports it {#step6}
Redis and Memcached are available on certain plans, such as our Performance plans. An upgrade may be required if your current plan does not include them.
If caching is the cake, Redis and Memcached are the cherry on top. They add another layer of speed by storing data in the server's RAM - the fastest storage available - rather than on disk.

They are particularly useful for areas that page caching cannot easily reach:
- Persistent memory storage - data stored in RAM is retrieved almost instantly.
- Frontend and backend caching - while they can speed up visitor-facing pages, their biggest impact is often on logged-in and admin pages that a standard page cache cannot serve.
In the context of WordPress specifically:
- Object cache - Redis can store the results of frequent database queries in RAM, avoiding repeated database hits and speeding up page loads.
- Admin performance - the WordPress admin area, which cannot be served by a page cache, becomes noticeably faster and more responsive.
Kualo is one of the few shared hosting providers to offer these tools. If you are on a compatible plan and your application supports them, it is well worth enabling.
If your application supports both Redis and Memcached, Redis generally produces better results.
Step 7: Use a Content Delivery Network {#step7}
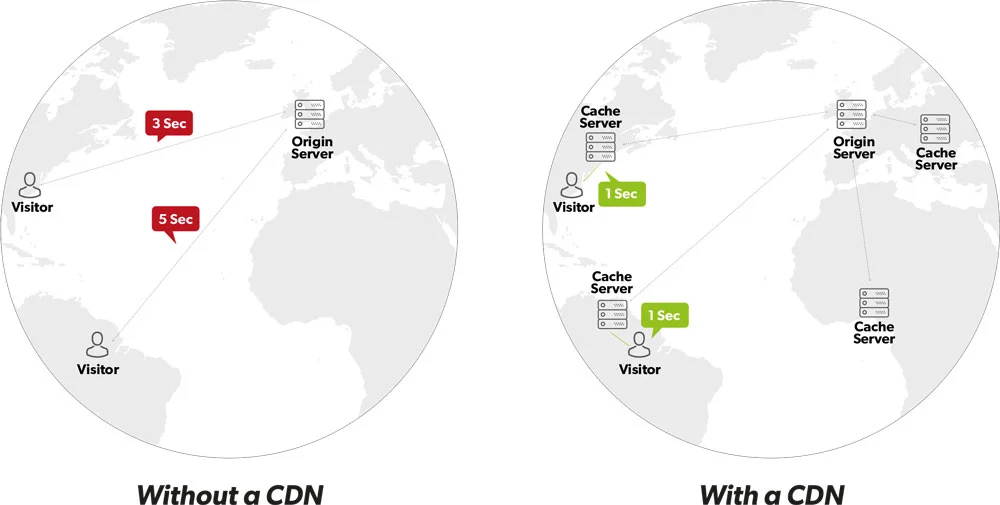
A Content Delivery Network (CDN) improves how quickly your site loads for visitors around the world by distributing static files - images, JavaScript, CSS - across a global network of servers. The closer those files are to your visitor, the faster they arrive.
Well-regarded CDN options include:
- Cloudflare - free tier available, with paid options for additional features.
- BunnyCDN - paid only, but very cost-effective.
If you use WordPress, QUIC.cloud - LiteSpeed's own CDN - can cache your HTML pages on a global network in addition to static files. We cover this in detail in our LiteSpeed Cache optimisation article.
Step 8: Use InnoDB rather than MyISAM {#step8}
MySQL database tables use one of two storage engines: MyISAM or InnoDB. Think of them as two different filing systems.
MyISAM is like an older filing cabinet where the entire drawer locks when someone is using it. Anyone else who needs a file in that drawer has to wait. InnoDB is like a modern cabinet where only the specific file being accessed is locked - other people can still reach the rest of the drawer at the same time.
MyISAM was the default engine before MySQL 5.5.5, after which InnoDB became the standard. Many applications still create MyISAM tables for compatibility reasons, but InnoDB is generally more reliable and performs better under load.
You can convert MyISAM tables to InnoDB using phpMyAdmin, and our support team can help with this. If you use WordPress with LiteSpeed Cache, the plugin can also handle the conversion in a few clicks - we cover this in our LiteSpeed Cache article.
Step 9: Run wp-cron.php as a real cron job (WordPress only) {#step9}
This step applies to WordPress sites only.
WordPress uses a script called wp-cron.php to handle scheduled tasks - things like publishing scheduled posts, checking for updates, or running plugin routines. By default, this script is triggered whenever a visitor loads a page, not on a fixed schedule.
Imagine a shop where every time a customer walks in, a member of staff has to stop and restock the shelves before serving them. Sometimes that task is quick; sometimes it is not. Either way, the customer is kept waiting. That is what happens when wp-cron.php fires on visitor requests - it can add unpredictable delays, especially if a plugin is running something substantial like a backup.
The solution is to disable the default behaviour and run wp-cron.php as a proper scheduled task (a cron job) instead - like a night-shift worker who handles the heavy lifting while the shop is quiet.
You can set this up in WP Toolkit:
- In cPanel, open WP Toolkit.
- Find your WordPress installation.
- Toggle Take over wp-cron.php to on.

This creates a background cron job that runs wp-cron.php automatically twice an hour, without affecting your visitors.
Summary
These nine steps cover the most impactful ways to improve your site's speed and efficiency - from keeping code current and tuning your PHP environment, to caching, databases, and scheduled tasks. Even complex sites with many plugins can perform impressively when these foundations are in place.
For WordPress users, the next step is our in-depth LiteSpeed Cache optimisation guide, which builds on everything covered here.
If you are still running into speed issues after working through these steps, get in touch - our team is happy to help.