On this page
How to set up Memcached in cPanel
Memcached is a high-performance memory caching system that speeds up your website by keeping frequently used data in RAM. Here is how to enable and use it in cPanel.
Memcached is a high-performance, distributed memory caching system. It speeds up dynamic, database-driven websites by caching data and objects in RAM, so your application queries the database far less often.
Memcached and Redis do a similar job. If you are not sure which to use, see the difference between Redis and Memcached on Kualo. To set up Redis instead, see how to set up Redis in cPanel.
Enabling Memcached
-
Log in to cPanel and, in the Software section, click Memcached.
-
Memcached starts out inactive. Under Get Started you will see the dedicated cache memory included with your plan (for example, 384 MB). Click Enable Memcached.
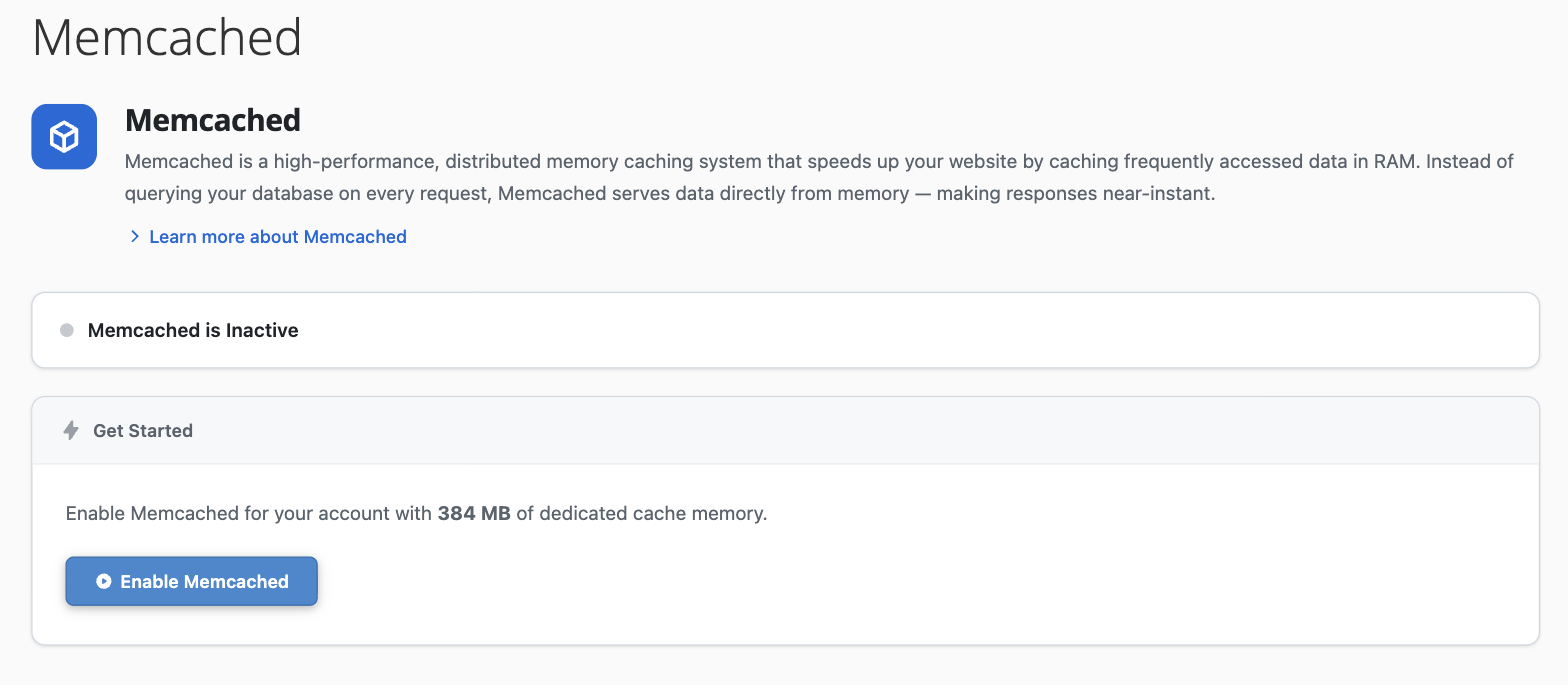
Memcached activates straight away and the page switches to a live dashboard.
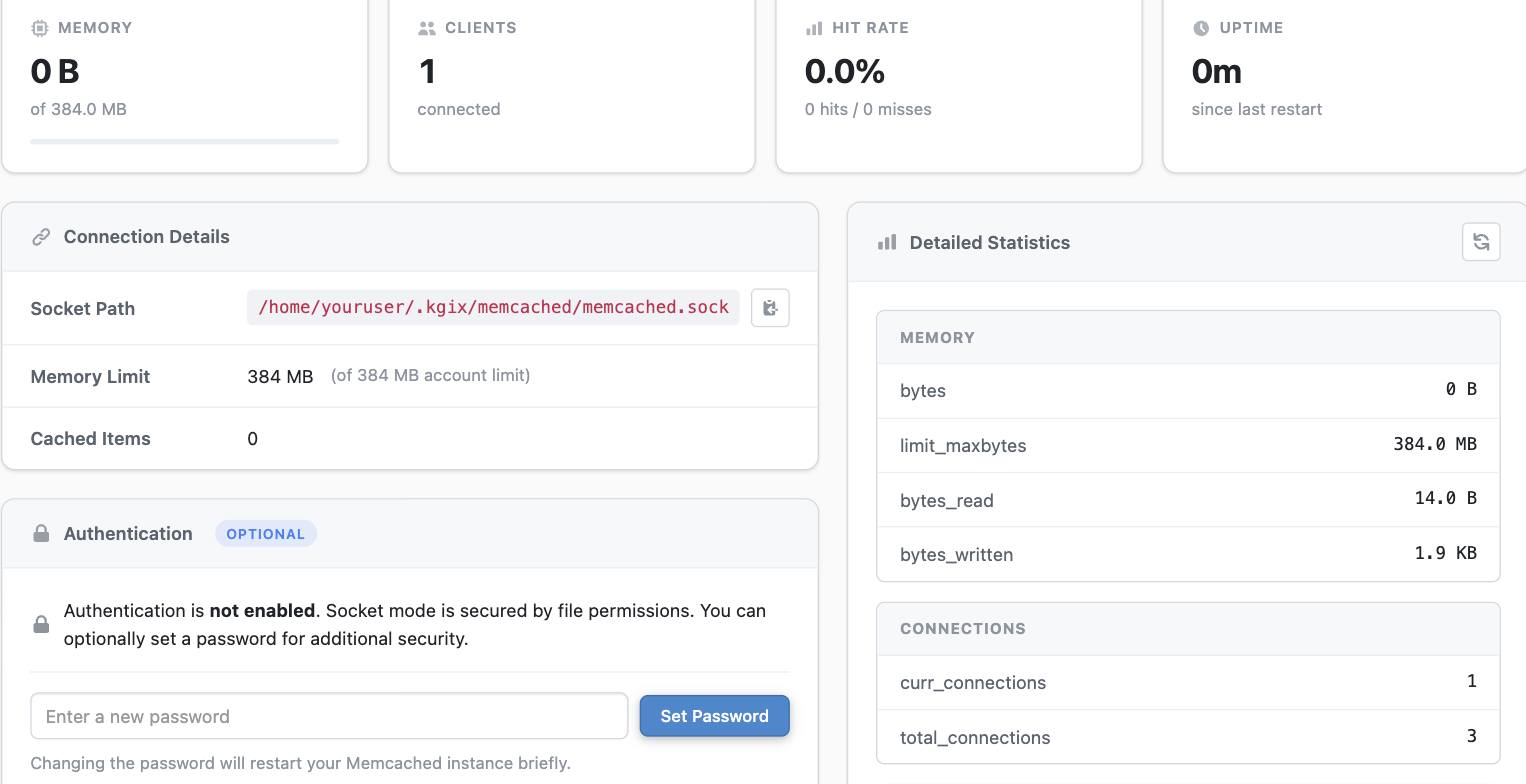
Your Memcached dashboard
Once Memcached is active, everything you need sits on a single dashboard - the current status, live performance metrics, your connection details, an optional password, and detailed statistics.
Connecting your application
Memcached on our platform runs over a UNIX socket rather than a TCP host and port. This avoids network overhead and is faster than a standard 127.0.0.1:11211 connection.
Your unique socket path is shown in the Connection Details card. It includes your account username, so yours will differ from the example below:
/home/your-username/.kgix/memcached/memcached.sock
Use the copy button next to the socket path, then enter it in your application's cache configuration. How you enter it depends on your application:
- Many applications and Memcached client libraries let you specify a UNIX socket path directly - enter the full socket path and you usually will not need a port.
- If your application only offers host and port fields, pass the socket path as the host and
0as the port.
The exact setting varies by application, so check its documentation if you are unsure where to add it.
Enabling the Memcached PHP extension
If you are connecting from a PHP application, you also need the memcached PHP extension enabled.
- In cPanel, open Select PHP Version and go to the Extensions tab.
- Tick memcached, then save.
Monitoring performance
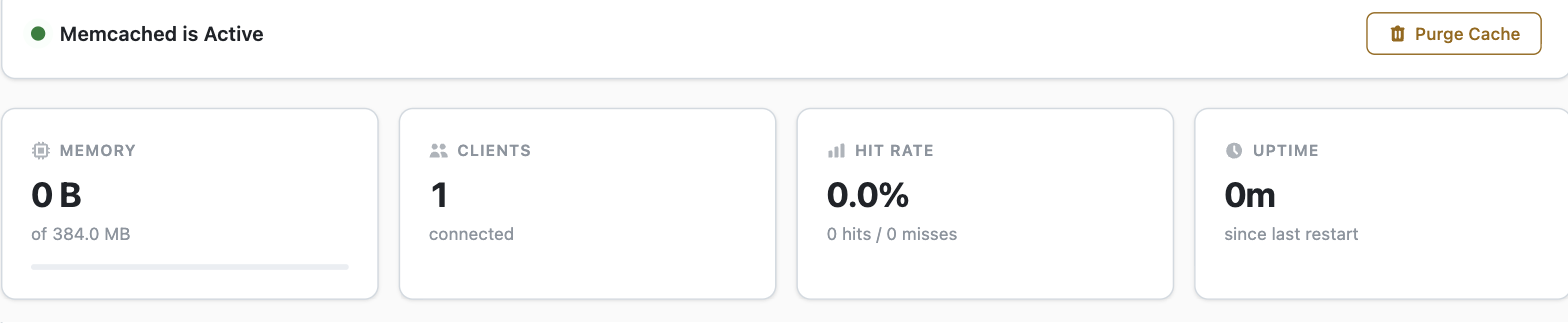
The dashboard's headline tiles show your Memory use against your limit, the number of connected Clients, your cache Hit Rate, and the Uptime since the last restart. The Detailed Statistics panel breaks memory and connections down further in real time.
A high hit rate means most requests are being served straight from the cache; lots of misses can mean your application is not caching effectively.
Setting a password (optional)
By default your Memcached instance is reachable only by your own account over the local socket, which is secured by file permissions, so a password is not required. If you would like to add one, use the Authentication card on the dashboard.
Setting or changing the password restarts your Memcached instance briefly, which clears anything currently cached.
Clearing the cache and disabling Memcached
- Purge Cache, at the top of the dashboard, immediately clears all cached data without disabling the service - handy for a clean slate after a deployment.
- To turn the service off completely, use the Disable control in the Danger Zone at the bottom of the dashboard. This stops Memcached and clears all cached data; you can re-enable it again at any time.
Purging, restarting, or disabling Memcached clears everything currently in memory, so your application has to rebuild its cache. Plan it for a quiet period where you can.