On this page
How to integrate LiteSpeed Cache into Joomla
Install and enable the LiteSpeed Cache plugin for Joomla in a few straightforward steps.
This guide walks you through integrating LiteSpeed Cache into your Joomla site using the official LiteSpeed Cache plugin.
Before you start
Make sure LiteSpeed Cache is enabled in your cPanel before following the steps below.
Step 1 - Disable conflicting cache plugins
Deactivate any other full-page cache modules in Joomla, such as "System - Page Cache" or "JotCache". Running multiple cache plugins at the same time can cause conflicts.
Step 2 - Enable cache lookup in .htaccess
Add the following directives to the .htaccess file in your Joomla site's root directory:
<IfModule LiteSpeed>
CacheLookup on
</IfModule>
Step 3 - Install the LiteSpeed Cache plugin
- Download the LiteSpeed Cache plugin for Joomla from the LiteSpeed GitHub repository.
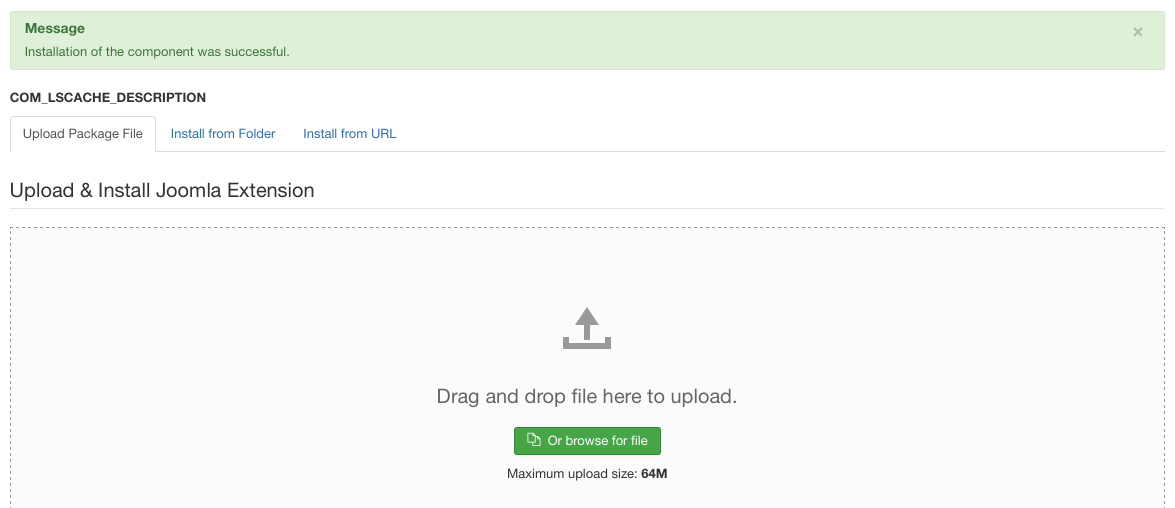
- In your Joomla Administrator, go to Extensions > Manage > Install.
- Click Browse Files, select the downloaded zip file, and upload it.
Step 4 - Enable the plugin
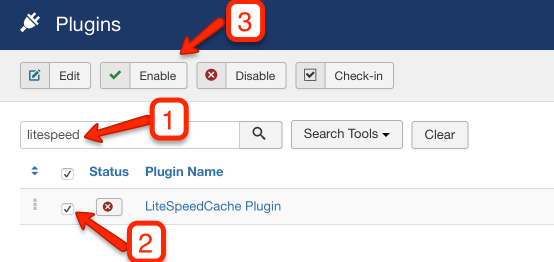
- Go to Extensions > Plugins.
- Find the LiteSpeed Cache plugin and enable it.
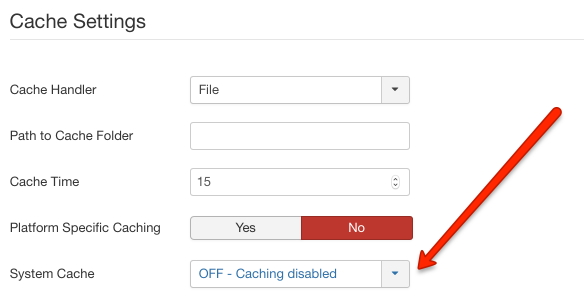
To adjust the plugin's settings, go to Components > LiteSpeed Cache.
Step 5 - Verify the integration
To confirm LiteSpeed Cache is working correctly:
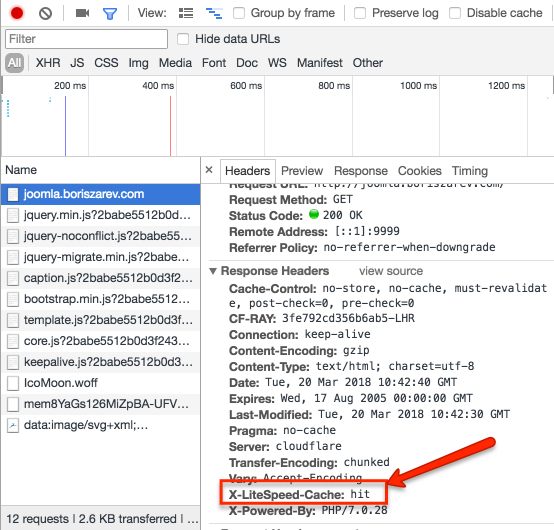
- Open your Joomla site in Chrome.
- Open Developer Tools (F12) and go to the Network tab.
- Reload the page and select a request.
- In the response headers, look for
X-LiteSpeed-Cache: hit.
If you see that header, LiteSpeed Cache is successfully integrated.
If you need help setting up or configuring LiteSpeed Cache, contact the Kualo support team.