On this page
Using the 'hosts' file to test or develop a website
Edit your local hosts file to point your browser directly at your Kualo server, so you can test or develop your site before DNS has propagated - without affecting what anyone else sees.
If you are migrating to Kualo or building a new website, you may need to access the site before DNS has propagated. Editing your local 'hosts' file points your browser directly at the server's IP address, letting you test in a real environment without affecting what anyone else sees.
The hosts file approach works well for personal testing, but the changes only apply to your own machine - you cannot share a preview link with a client or colleague this way. If you need shareable previews, see our companion article on previewing your website with SkipDNS.
How it works
Modern PHP frameworks use URL rewrite rules to produce clean, SEO-friendly addresses. Because those rewrites rely on the domain name, simply browsing to the server's IP address often breaks the site. Editing the hosts file tells your operating system to resolve the domain to a specific IP address locally, so the full URL - rewrites and all - works correctly in your browser, while the rest of the world continues to reach the live site as normal.
Think of it like a private shortcut: your computer looks up the hosts file before it checks DNS, so it goes straight to the IP address you specify, but only for you.
What you will need
- Access to cPanel for your Kualo hosting account
- Administrator or sudo access on your computer
- A plain-text editor (see the OS-specific notes below for recommendations)
Step 1 - find the hosts file on your computer
The hosts file is stored in a different location depending on your operating system.
| Operating system | Path |
|---|---|
| Windows | C:\Windows\system32\drivers\etc\hosts |
| macOS | /etc/hosts |
| Linux | /etc/hosts |
Do not open this file yet - you will need the IP address from Step 2 before you make any changes.
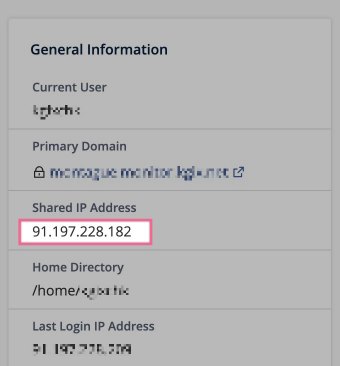
Step 2 - find your server's IP address in cPanel
- Log in to cPanel.
- Look at the General Information panel on the right-hand side of the home screen.
- You will see either Shared IP Address or Dedicated IP Address listed there.
- Make a note of that IP address - you will need it in the next step.
Step 3 - open and edit the hosts file
How you open the hosts file depends on your operating system. You must have administrator or sudo access to save changes.
Windows
- Click Start and search for Notepad.
- Right-click Notepad in the results and choose Run as administrator. If prompted by User Account Control, click Yes.
- In Notepad, go to File > Open.
- Navigate to
C:\Windows\system32\drivers\etc\. - Change the file type filter (bottom-right of the Open dialog) from Text Documents to All Files, so the hosts file becomes visible.
- Select hosts and click Open.
macOS
- Open Terminal (you can find it in Applications > Utilities, or search with Spotlight).
- Run the following command:
sudo nano /etc/hosts
- Enter your administrator password when prompted. You will not see any characters as you type - this is normal. Press Return when done.
Linux
- Open a terminal.
- Run the following command, substituting your preferred editor if you do not use nano:
sudo nano /etc/hosts
- Enter your sudo password when prompted.
Adding the hosts entry
Once the file is open, scroll to the bottom. You will see existing entries - do not change those. Add a new line in this format:
1.2.3.4 yourdomainatkualo.com www.yourdomainatkualo.com
Replace 1.2.3.4 with the IP address you found in Step 2, and replace yourdomainatkualo.com with your actual domain name.
For example, if your IP address is 185.23.144.10 and your domain is example.com, the line would look like this:
185.23.144.10 example.com www.example.com
Saving the file
- Windows - go to File > Save in Notepad.
- macOS and Linux (nano) - press
Ctrl+Oto save, then press Return to confirm the filename, then pressCtrl+Xto exit.
Step 4 - refresh your browser
Close your browser completely and reopen it, or clear its cache. This ensures your browser picks up the new hosts entry rather than using a cached DNS result.
You should now be able to browse to your domain and see the Kualo-hosted version of the site.
If the site does not load as expected, double-check that you saved the hosts file correctly and that there are no typos in the IP address or domain name.
Step 5 - revert when you are done
Once DNS has fully propagated and you no longer need the hosts file entry, you must remove it - otherwise your computer will keep bypassing the live DNS record and you will continue to be routed to the IP address you specified.
To remove the entry, open the hosts file again (following the same steps as above) and either:
- Delete the line you added, or
- Comment it out by placing a
#at the start of the line, like this:
# 185.23.144.10 example.com www.example.com
Save the file, then close and reopen your browser and clear its cache.
Leaving the entry active after DNS has propagated means only you will be affected - but you will not be seeing the same site as everyone else, which can cause confusion.
Further reading
For background on how the hosts file works, see the Wikipedia article on the hosts file.